The first part of the study task was to model the demo character for scratch. In terms of the shape and complexity of the model it was quite simple but still needed to be approached in a thoughtful way or the model could easily go wrong. Furthermore, we had side and front reference imagery to work with and could shape the model in accordance with the images - so this made the task a little easier. I started with the main torso and body, followed by the legs and arms and finally the head. I thought doing it this way, and modelling in order of complexity it meant that I could get a feel for the software before I had to attempt something more difficult, the guides that Mat made for us were also in a similar order to this.


The next step was UV mapping the model. This again was a completely foreign concept at first but looking back now, it was relatively simple and just felt quite different because it's not something we had undertaken before. UV mapping allows you to explode the outer surface of an object in order to add colour or whatever design you like to the surface of a model. It uses a mixture of interfaces and functions in Maya in order to do this, including the UV map editor which is an essential tool when trying to obtain an objects UV. Once the UV is mapped you can import it into Photoshop and cover it in whatever design you like, before importing it back into Maya in order to rewrap it around the model, now with the design added.

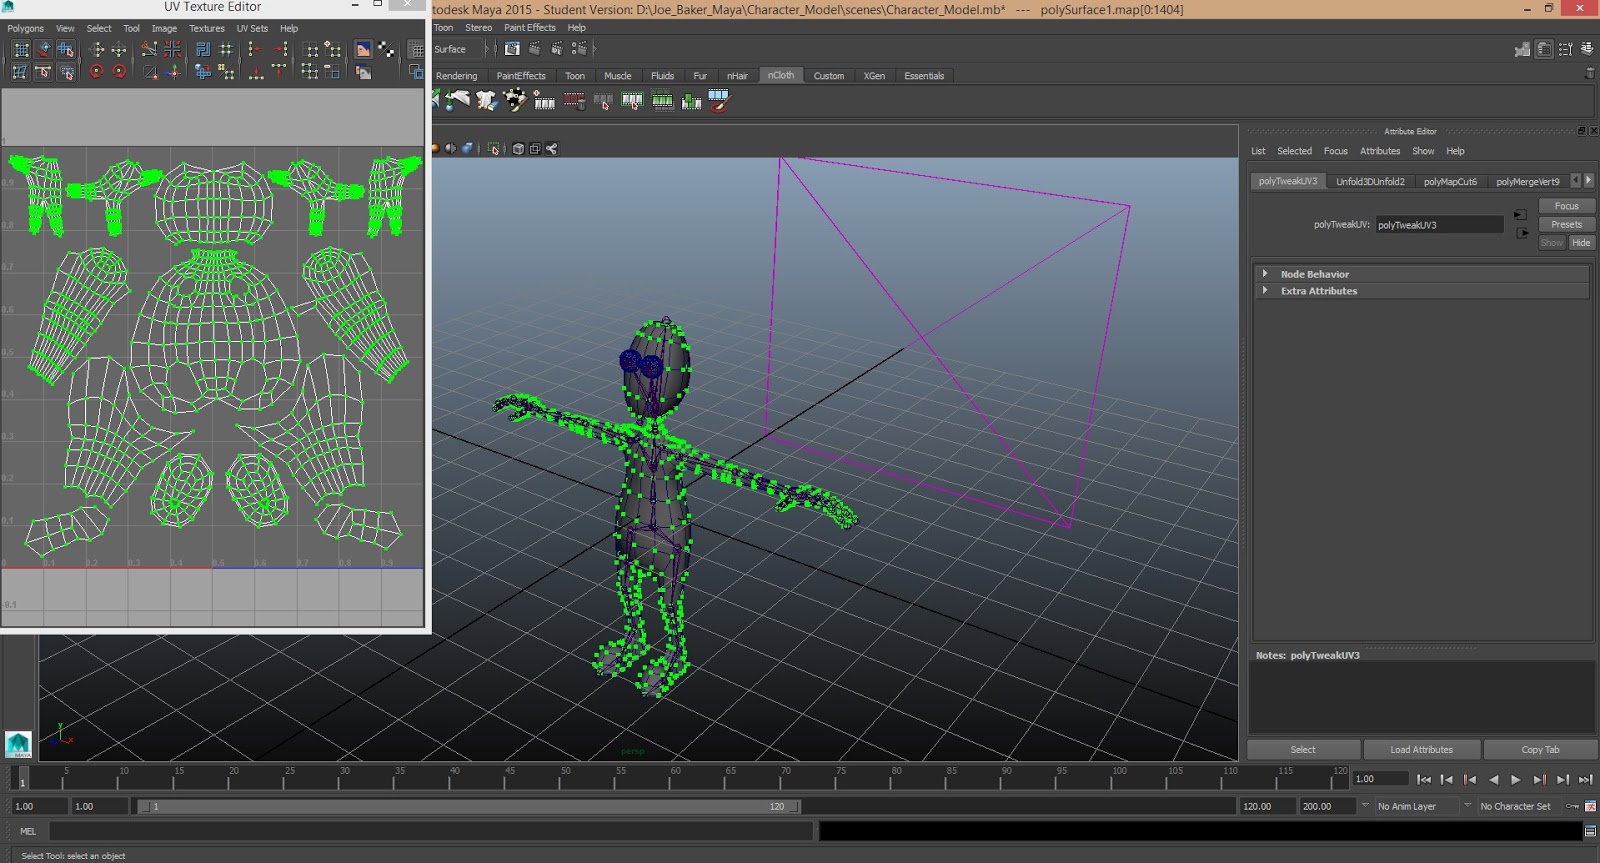
Once the UV mapping is complete the main model is completed and the next stage involves creating the skeleton. This is done using the joint tool and is relatively simple in that it is a simple case of connecting joints to joints. The best way to think about it I think it to take a section at a time like an arm and work from the hand to the elbow, then the shoulder then the clavicle. Doing it like this makes it easier to keep track of what you've done and keeps things tidy. Then the next step is to create the controls for the model. The controls are the things that you move when your model is fully rigged and ready to be animated. They allow you to move individual limbs and sections of a model before key framing them. The way they are produced is using primitive NURBS, most commonly NURBS circle. These are shape outlines that can be moulded to fit the different sections of the model. Similar to when creating the model, the controls that can be copied over from the left and right are done on the left side first and then mirrored across. This includes the controls for the left foot, knee, leg, ankle, toe, hand, elbow, shoulder and clavicle. The central controls, that controlled the main body of the model included the head, neck, chest, back, hip and two central controls called the 'root' and the 'master controller', which moved the whole models body. The last stage of creating the controls is to colour code them. The central controls are made yellow whereas the left side is made blue and the right side red. These are chosen mostly due to their high contrast, so they are easy to distinguish from one another.


I think outside of the complexity of modelling objects, the next stage in the process is probably the most technically difficult part of the process. The next section encompasses orienting the different joins, creating joint hierarchy and joining the skeleton to the controls, and then to the mesh or model. Orienting the joints is so that the joints are angled at the correct direction to correspond the the other joints around it - and orient them in a straight line. This is done using the Constrain > Orient function. Next, is creating the joint hierarchy. This is quite simple but can be complex due to the amount of joints that have to be parented in a hierarchical fashion. For example, the hand joint would be parented to the wrist, which is parented to the elbow, and then to the shoulder and the clavicle. So using an arm as an example, it moves up in that kind of hierarchical fashion. This is done using the outliner as a tool, selecting the joint and pressing up before selecting the controller you would like to parent it to and hitting 'p' for parent. A similar process then has to be done by parenting the joints to the controllers. Once this is complete the rigging process is almost done and the skeleton just has to be binded to the mesh. Once this is done, the model is nearly ready for animating, and just needs one more process - which is the weighting.


The final step is adding the weightings to the model. The weightings are painting onto a model to determine the amount of influence a section has over others. For example, the foot should not have any influence over the arm when it's moved, and these weightings have to be done manually to determine in a way how you want the character to deform and move. I spend quite a lot of time on this section trying to adjust the weightings and then test the effect it had on the model. This idea of painting on the influence seemed quite strange at first but it was quite easy to get used to.


Overall, I learnt a huge amount about Maya and the development of characters through this process. I was also introduced to rigging and the method behind it in order to make it work as a fully functional character in terms of animation.
No comments:
Post a Comment