The learning curve for this module has been enormous. Having been asked to work in a way which I haven't previously allowed me to approach the brief with a fresh outlook and take a experimental approach whilst pushing the boundaries as much as I could. I wanted to make sure I took full advantage of the opportunity to learn more about 3D modelling and animating in this way, as well as develop my pre-existing skills such as the pre-production and post-production processes. Looking back to September when the brief was first set and we were brainstorming ideas, I had no idea the amount of content I was set learn about and how much work I would be able to produce given the two and a half month duration given to us. I've tried to adapt my skills throughout the module and undertake new things within Maya by myself, whilst trying to remain clear of my limitations and the constraints of the module. This project has tested my problem solving skills and encouraged me to think in a way that I haven't before with a brief. Fortunately the work Wing and I were producing was quite close to what we envision at the start, and we were able to stick closely to our initial ideas.
Approaching a brief of this nature and with it being something I had no prior experience with things were expected to go wrong. The biggest problems I encountered during the module were predominantly technical problems with a variety of software programs such as Maya, Premiere Pro and After Effects. Having used Premiere Pro and After Effects quite frequently I thought this stage would be okay but we seemed to quite consistently encounter problems. The problems were mostly with Maya but this was just due to our inexperience with troubleshooting the software combined with a general lack of experience. This is the first time I have collaborated with someone else on a creative project, and I'm pleased to say that I really enjoyed working with Wing and think we both contributed a lot to the successful undertaking of our animation. We were able to share the workload evenly between the two of us and found a good balance in this respect. Both of us were able to play to our strengths within the process allowing us to learn from each other. Many times throughout the project I was blown away at the high standard of Wing's work and this encouraged me to step up and work even harder to make sure I didn't bring the quality of our work down. Furthermore, the experience has taught me a lot about how to communicate with someone during the planning an execution of a brief and overall I was confident in our ability to find a good solution to the brief.
When we had our interim crit I felt that Wing and I had established our idea quite well and I was happy with the progress we had made. At this point we had produced several story boards demonstrating our initial ideas for narrative as well as an animatic which also featured the music we used in our final animation. The premise of the characters and the narrative were well received by my tutors and peers which gave me the confidence to push the idea forward along with the helpful contributions and input of the class. Another thing I've tried to do more and enjoyed doing is asking more questions and trying to learn from both Mat and Sara. They are both very knowledgable about certain areas such as using Maya, shot framing, storytelling and character designing and I realised that it's important to try and seek help when it's needed from people who are experienced with what I'm trying to do.
For me personally, one of the most prevalent factors in making sure this was a successful project was how I managed my work load. There was quite a few ways I tried to make sure that I was prioritising work and completing individual tasks in good time. We were also fortunate enough to be given a break down of our time and an overview of where we should be up to each week. Aside from this I made sure to set myself personal goals, noting down lists of tasks that had to be completed in order of priority and in an order that would enable me to work in the most efficient way I could. For example, if I was able to multitask then I would make sure I did, so rendering frames across multiple computers whilst working on the scenes that have been rendered. Outside of the actual production process, I tried to stay on track with the documentation and usually used the weekends to write up everything I did during the week. This usually took quite a few hours due how quickly progress was being made and the amount of work we were producing. However, this seemed to be quite an effective way to manage it, and at no point did I feel like I had to catch up on the documentation side of the project. Another thing I did was invest in a white board so I could write down things I needed to do including any reminders for the project. I was able to keep all of the current and relevant information around the module in this format so that I could refer to it whenever I needed to.
If Wing and I had more time to refine the animation further I would want to revisit a couple of things. Firstly, there is a scene in the second half of the animation where a character walks outside, and in the final version the scene is quite blown out and a lot of the objects in the scene are white. This was an unfortunate rendering mistake but by the time we realised what the frames that were rendering looked like, (after around seventy had been produced) it was too late on in the production process to redo it as we would't have been able to finish the full animation. Or at the very least it would have been too close to the deadline. Furthermore, I would have liked to consider some of the shots more and told the story a little differently. Now I've seen the finished piece I can see where there could have been minor improvements in the storytelling and how the narrative was visualised.
Although at first the brief seemed quite daunting due to my inexperience and unfamiliarity with 3D animation and software I think after the process starting everything started coming together and the progress throughout was quite constant. It has been a great experience to collaborate with a classmate, and it is a good introduction the way collaboration works in animation and the animation industry. I'm pleased with the work I've put in and produced during this module, it's been a good experience and hopefully I can build on this and use what I've learnt for future modules.
Wednesday, 9 December 2015
Tuesday, 8 December 2015
OUAN504 - SIGGRAPH, The Future of Computer Graphics
SIGGRAPH, which is short for 'Special Interest Group on Graphics and Interactive Techniques', is something I hadn't personally heard of before looking into the graphics and CG industry as I have been in recent weeks. SIGGRAPH is actually the chosen name of an annual conference that revolves around computer graphics convened by the ACM SIGGRAPH organisation. The first SIGGRAPH conference was held in 1974 which I believe was around the very start of computer animation and CG as we know it today. The conference is attended by thousands of professionals, specilising in the industry and is a place where ideas are discussed and new developments are demonstrated and revealed all in the aid of pushing the industry forward and of course pursuing individual interests and passions for what they do. In the past the conferences have been held in cities all over the United States and Canada, including; Los Angeles, Dallas, New Orleans, Boston and Vancouver among some other US cities. Some of the usual highlights of the conference are its Animation Theater and Electronic Theater presentations, which is where recently created CG films are shown to an audience. Aside from this, there is also an exhibition floor where companies are able to demonstrate what they do and in a sense pitch themselves to the people attending the event. The purpose of this is to recruit employees, spread the company name and demonstrate what they do. The majority of the companies are invested in different industries such as the engineering, graphics, motion picture, or video game industries. Aside from booths and stands set up by companies, there is also some which are set up by specialised schools, which are dedicated to interactive arts or CG and graphics.

SIGGRAPH is a place where each year, tens of research papers are presented focused around the industry and moving forward. In terms of the prestigious hierarchy, SIGGRAPH is probably considered the most prestigious forum for which publications of computer graphics research are shown and presented. In recent years the acceptance rate for papers of this nature has been around 26%, so around one in four are accepted. The papers that are submitted are peer-reviewed and the ones that are accepted based on the blind process that is conducted for each assessment are printed in a special issue of the 'ACM Transactions of Graphics Journal'. This has been the case since 2003. However, before this the publications were shown in a specific SIGGRAPH magazine for the published papers. In addition to the papers and research aspect of the conferences, there are a lot of panels hosted by industry leaders and experts which set up and undertake discussion on different topics surrounding the industry and areas outside of it; including; computer graphics, education, and interactivity. In a similar fashion the conference offers artists the opportunity to discuss their latest work - which is of course a huge opportunity for both the artist and the audience. In 1984, John Lasseter's first computer animated short, The Adventures of André & Wally B. premiered at SIGGRAPH, at the time under Lucas Film before Pixar had broken away from the Lucas Film company. Luxo, Jr. which was Pixar's first animated short then followed up in 1986. Pixar is quite a regular contributor to the conference in terms of showcasing work, and often shows films there quite early. SIGGRAPH also has an awards program that consists of several awards to recognise the outstanding contributions to computer graphics. The most prestigious award from the three available is titled the the 'Steven Anson Coons Award for Outstanding Creative Contributions to Computer Graphics'. This particular away has been awarded every two years since 1983, and it's main purpose is to recognise an individual's lifetime achievement in computer graphics. The company encompasses a huge range of industry areas and general topics. Some of these include, outside of the ones already mentioned software development, digital art, game design, visual effects, computer science, graphic design, and film and television production. It's also worth mentioning that this is a non-profit organisation. I like this because it demonstrates the organisation's interests and their personal involvement with the development of the industry.
SIGGRAPH is a place where each year, tens of research papers are presented focused around the industry and moving forward. In terms of the prestigious hierarchy, SIGGRAPH is probably considered the most prestigious forum for which publications of computer graphics research are shown and presented. In recent years the acceptance rate for papers of this nature has been around 26%, so around one in four are accepted. The papers that are submitted are peer-reviewed and the ones that are accepted based on the blind process that is conducted for each assessment are printed in a special issue of the 'ACM Transactions of Graphics Journal'. This has been the case since 2003. However, before this the publications were shown in a specific SIGGRAPH magazine for the published papers. In addition to the papers and research aspect of the conferences, there are a lot of panels hosted by industry leaders and experts which set up and undertake discussion on different topics surrounding the industry and areas outside of it; including; computer graphics, education, and interactivity. In a similar fashion the conference offers artists the opportunity to discuss their latest work - which is of course a huge opportunity for both the artist and the audience. In 1984, John Lasseter's first computer animated short, The Adventures of André & Wally B. premiered at SIGGRAPH, at the time under Lucas Film before Pixar had broken away from the Lucas Film company. Luxo, Jr. which was Pixar's first animated short then followed up in 1986. Pixar is quite a regular contributor to the conference in terms of showcasing work, and often shows films there quite early. SIGGRAPH also has an awards program that consists of several awards to recognise the outstanding contributions to computer graphics. The most prestigious award from the three available is titled the the 'Steven Anson Coons Award for Outstanding Creative Contributions to Computer Graphics'. This particular away has been awarded every two years since 1983, and it's main purpose is to recognise an individual's lifetime achievement in computer graphics. The company encompasses a huge range of industry areas and general topics. Some of these include, outside of the ones already mentioned software development, digital art, game design, visual effects, computer science, graphic design, and film and television production. It's also worth mentioning that this is a non-profit organisation. I like this because it demonstrates the organisation's interests and their personal involvement with the development of the industry.
OUAN504 - Interstellar, The Black Hole
Around the time that Interstellar was released I spent a lot of time reading about the way the film was made, as I hold a personal interest in it and furthermore I am interested in the way that Christopher Nolan makes his films. I came across a story detailing the innovations made in order to create the black hole scene in Interstellar. I was blown away by the level of thought and dedication that had been placed into the scene and there was also some interesting information about the way it was made, and how long it took to render such a complex scene.
The studio behind the visual effects for this scene was Double Negative. For many films artists are sometimes asked or required to produce images of objects or concepts that doesn't have any accompanying reference imagery, and is hard to imagine. For Christopher Nolan's film Interstellar which is a story based around 'inter-dimensional' space travel, visual effects supervisor Paul Franklin and and the artists at visual effects studio; Double Negative were asked to produce images of a black hole. Not only were they required to make it look real and 'accurate' despite the fact that no one has ever seen one they were also asked to make sure it was accurate to quantum physics and relativistic laws as well as have the best understanding of quantum gravity that they could achieve. How could they do this? Fortunately for the visual effects team and for the film itself, scientist Oliver James was among the people working on the project at Double Negative. James studied optics and atomic physics at Oxford University and possesses a personal understanding of Einstein’s relativity laws that needed to be applied to this project. He worked with scientific advisor Kip Thorne, who was Nolan's personal advisor for the film during production and whilst he was writing the script. I watched an interview with Nolan and Thorne where he said that he would meet up with him and suggest ideas, and Thorne would approve or disapprove them on a scientific basis, or at least try to find a way that Nolan could incorporate these themes or ideas into the film. For the purpose of creating the black hole, Thorne would work out complex equations in software program 'Mathematica' and send them to James to recode into IMAX quality renderings of the imagery. (Mathematica is a symbolic mathematical computation program, sometimes called a computer algebra program.) To reach the requirements of the film and to solve the visual problems involved in creating a concept like this, James had to not only visualise equations describing the arcing and bending path of light but also the equations eventually described how the cross section of a beam of light changes its size and shape during its journey past the black hole. This level of collaboration eventually gave way to the visuals we can see in Interstellar. Of course, the code created by Oliver James was only part of the solution to the problem. Even then James’ code was only part of the solution. He worked closely with a full team of artists and designers, which was lead by CG supervisor Eugenie von Tunzelmann. Furthermore, as complex as their problem regarding the accuracy and realism of creating a black hole the team also had to show someone entering a four-dimensional 'tesseract', that casts shadows into the three dimensional space of a bedroom - all in a way an audience could follow and understand visually.
Arguably the most inspiring and striking result what was trying to be achieved in this particular film is the depiction of the black hole, 'Gargantua'. After the collaboration between the film makers and the studio in combination with scientists such as Kip Thorne, the filmmakers wnated to properly show the behaviour of a black hole and a wormhole, right down to the lighting or lack of it. For the visual effects studio Double Negative, this became a whole other project by itself, causing them to create a whole new vastly complex renderer which was capable of handling this. The render was mostly complex in the physical sense, referring back to what made this so amazing for me at least, the fact that they were trying to envision a phenomena that exists but no one has ever seen, and may not be able to. A quote from Paul Franklin; “Kip was explaining to me the relativistic warping in space around a black hole,” “The gravity being bent in space/time deviated the light around it producing this thing called the Einstein lens which is this gravitational lens all around the black hole. I was thinking about how we might go about creating that image and I was thinking about ways or references we could look at and see if there was an existing VFX process.” Something I read about the film once is that Christopher Nolan did not want to include a green screen in his film, or atleast avoid it as much as possible. I recall him having a lot of the sets including the ships built in some sense and this continues into the imagery that the actors were interacting with. He didn't want the actors to be looking at green screen for imagery to be later projected onto them. It was early imagery used in the process of the CG black hole which was in fact used on set as projections, placed outside the windows of the spacecrafts. No greenscreen was used during production on Interstellar. Later on in the production process, Double Negative replaced a lot of these projections with star fields amongst other selected views.
Overall, this is another great example of how studios and film makers are pushing boundaries and breaking the norm when it comes to the use of CG in film and entertainment as a whole. Throguh the use of experts that weren't originally from the field of visual effects or having had a 3D background, different professionals were able to come together and create something incredible.
OUAN504 - The Last of Us, Motion Capture
I chose to look at motion capture for this task because I have never before looked into or had the opportunity to use it myself. However, I recently saw a behind the scenes video of the way the motion capture sessions were conducted during the production of the critically acclaimed video game title, 'The Last of Us'. What shouldn't have been to surprising the first time I saw it but I found interesting was the way in which the actors portraying the characters in the game acted out full scenes using the motion capture suit, which is then translated directly into the in game characters movement and expression. I'm not entirely sure why, it may have just been my unfamiliarity with the way motion capture works and is used, but I almost imagined it's function was for certain movements to be acted out. However, the way in which full scenes were expressed this way as they would be in a film only wearing a motion capture suit instead was eye-opening.
I want to start by looking at motion capture very generally, as before looking into this I didn't really have any prior knowledge to the way it was used and operated. Motion capture, or 'mo-cap' for short, is a process used to record the way objects and people move. It is used in a wide variety of fields and has a multitude of different ways including; entertainment, sports, medicine, and for validation of computer vision and robotics. In terms of what I looked at here, it was focused more around the way motion capture is used in filmmaking and video game development. This instance of motion capture refers specifically to recording actions of human actors, and then using that footage and the information gathered to animate digital character models in 2D or 3D, via commuter generated imagery. There is another term used to identify a specific kind of motion capture which involves subtle facial expressions and finger movements. This is often referred to as performance capture as oppose to motion capture. In motion capture sessions such as the one displayed in the video below, movements of one or more actors are sampled many times per second. In contrast to this, early techniques used images from different cameras to calculate positions. Often the purpose of motion capture is to record only the movements of the actor, not his or her visual appearance. The data containing the details of the movement is mapped to a 3D model so that the model performs the same actions as the actor. I suppose this process and approach to recording the movement of actors could be compared to the more traditional method of rotoscope. There are several instances where the movement of actors was filmed and then used as a guide for the frame-by-frame motion of a hand-drawn animated character sequences.
The way motion capture was used in the video game, 'The Last of Us' was that live acting were performed on a scene to scene basic, in order to produce the cut scenes for the game and thus tell the story in this heavily realistic and authentic way. Professional actors as oppose to just voice actors were hired to play different characters, most notably Troy Baker playing the main character - Joel. As the audience I understand and appreciate the need for scripted movement and dialogue in order to portray this intricate story in a way that it can be conveyed at the highest level possible. The interesting thing about recording scenes for video games using motion capture in this way is that it is incredibly challenging not just for the production team but for the actors themselves. It's difficult at first to understand the complications for video game actors, across all games produced in this way. Having to act a lengthy scene of movement and dialogue without their character's appearances, without the clothing that will be seen in the final version, and a completely non-existent setting. With each year that passes and more and more video games of this calibre being produced to a growing demand and a growing industry, actors some of which are quite well established are crossing over to the world of video game performance, it will be interesting to see how the mobcap will change and develop in this industry over the coming years.
The process involved in making these intricate cinematics include the raw motion capture footage where actors act out the scenes using movement and voice as if it was real life, however like mentioned before they have to wear the motion captures suits, and so lack character clothing or a realistic environment to perform in. Next, the movement is mapped onto the character or object models and a body pass is done. A body pass is essentially the first layer of clothing, colour, and featured are added to the characters - at this point, you can start to see everything coming together. After this a facial pass is conducted which adds in the facial expressions and facial movement of the characters. A lighting pass is then done, where the environments are added and lighting plus shadows are added. This is the part where I felt the scene really came to life and the characters and the environment are combined. A final version is then made with all the adjustments made to create the final piece.
Here is a brief quote from a developer at Naughty Dog talking about the process of storytelling and the overall creation of 'The Last of Us'.
“High tech cameras record the tracking markers on the mocap suits to capture these performances. Raw mocap data is taken to our team, cleaned up, and then the next step in the cinematic process takes place. Six steps in about a minute. Making game cinematics looks pretty easy, right? What you’ve seen is a time lapse showing over two years of planning, writing, performance, scripting, animation, lighting, and artistry. Then apply more tweaking, more adjusting, and more fine-tuning. And then some more before it ever goes out the door.”
Monday, 7 December 2015
OUAN504 - Transistor Studio - A Butterfly's Dream
For this research post I came across a video demonstrating the making of a television commercial message for the Kyoto Gakuen University, titled, 'A Butterfly's Dream'. The piece was made by a Japanese studio called 'Transistor Studio'. I like many people often see things that I'm unsure on how to do and am blown away by. 3D animation until recently was one of those things, but now I feel like I know a little more about it. However, I wouldn't have been able to explain how a feature like this is made and so I found this video explaining the process fascinating. Another thing I liked about it, is that it seemed at a glance to combine two different types of animation, 2D and 3D or traditional and computer generated. The video itself covers a range of different process and techniques (some I'm familiar with, some not so much) that are combined to create the final finished commercial.

Making of Kyoto Gakuen University TVC ~A Butterfly's Dream~ from Kohta Morie on Vimeo.
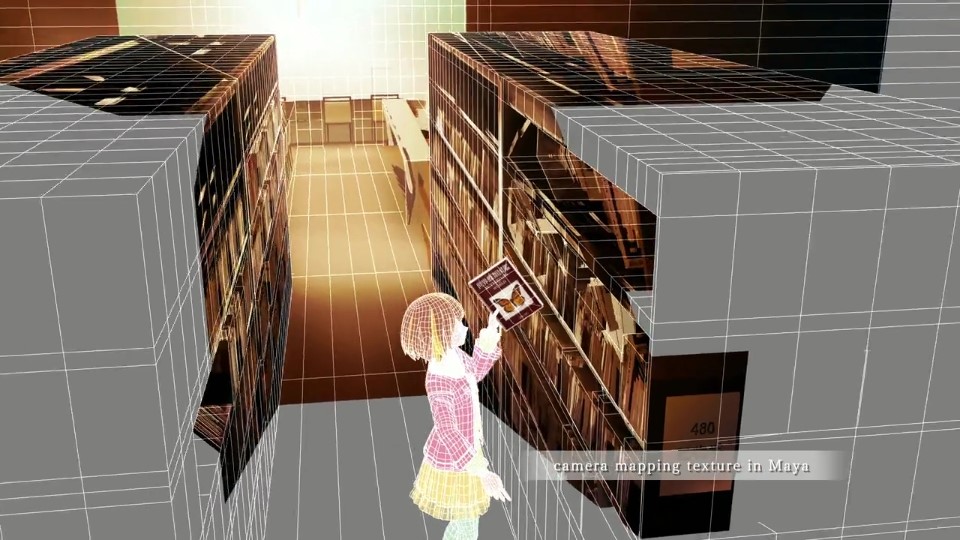
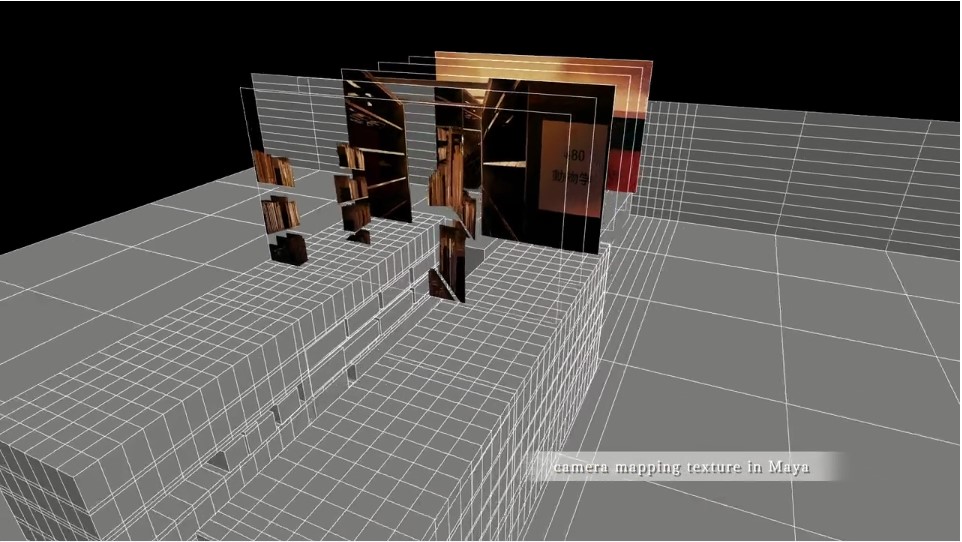
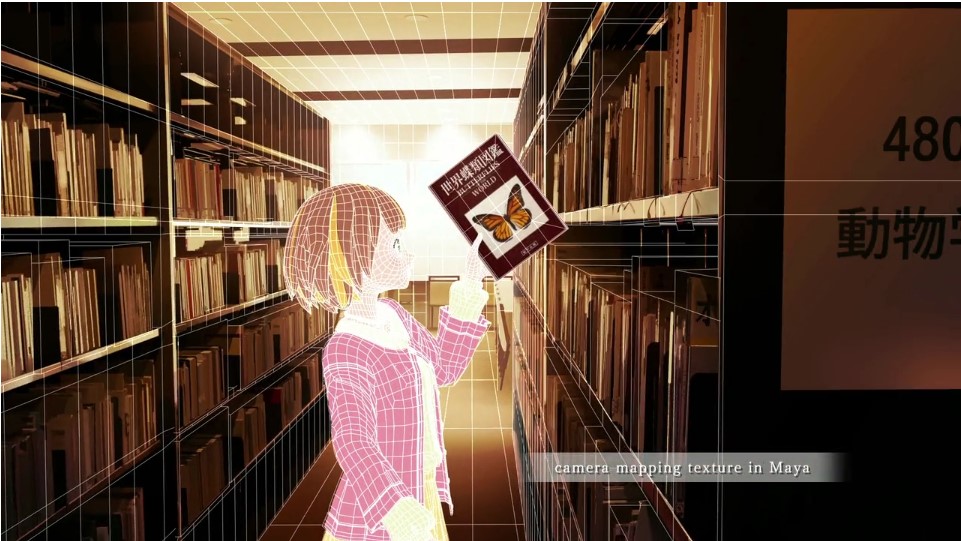
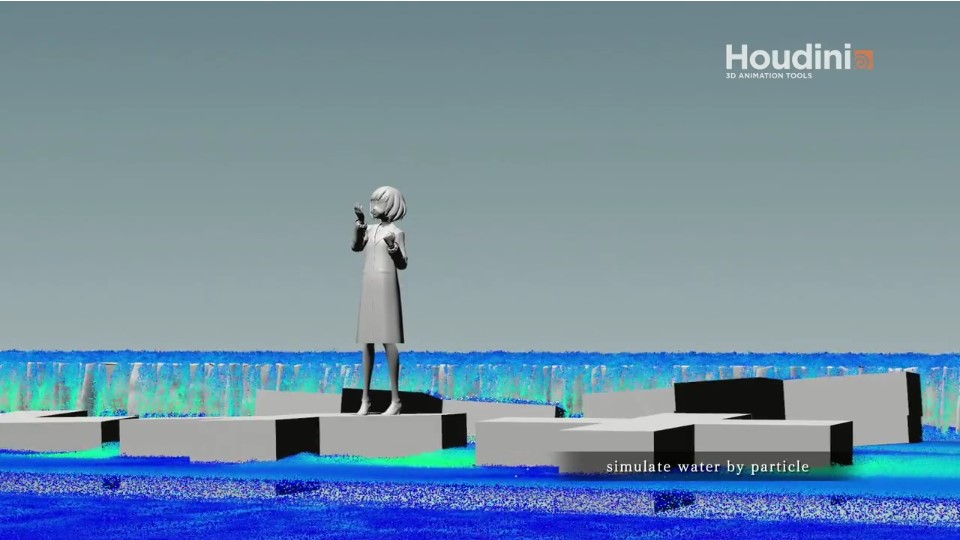
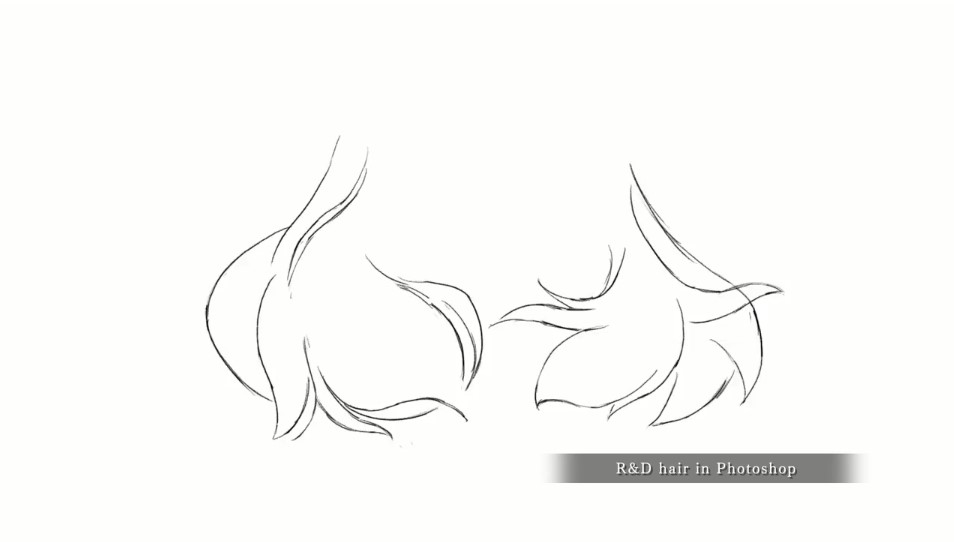
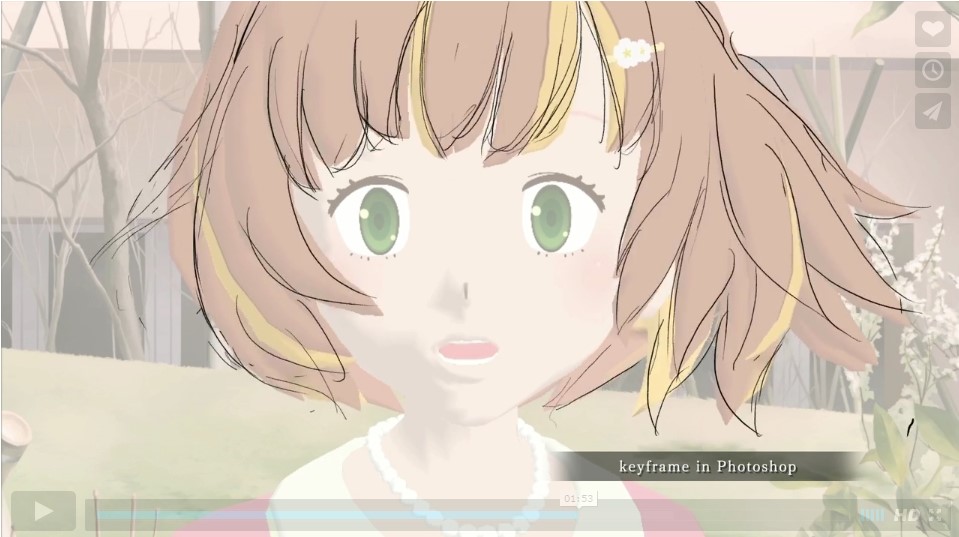
Firstly, the first scene of the animation where she's in the library is broken down and explained to the audience in a relatively thorough way. The scene is simple, but accurately modelled out using Maya. In this case since only the shelves are present in the shot along with the floor and walls, that's all that has been modelled. This is an interesting point because it shows how to save as much time as possible the scene is modelled to the point where the objects are necessary but nothing that wouldn't be in the shot has been added - this saving time. Next, a texture is mapped to the scene which includes the shelves and the books, all in the perspective of the camera. Again, I noticed this is only mapped onto the sections of the model that will be in the shot. Of course this makes a lot of sense, but it shows that any unnecessary work is again avoided and I think I'm starting to discover the importance of working as economically as possible, and this is a good example of that. The photographs used to map onto the set are kind of collaged very precisely onto the objects to make they look realistic from a certain viewpoint. Furthermore, I think these particular photographs have a nice lighting and tone to them but they weren't always like that. The photographs used for texturing were made using a base photograph which then had colour correction, composites, and other modifications applied to it in order to make it the correct tone and style of the animation. The animation here has a very stylised look to it. Specifically the environment comprises a typical realistic anime look, so very realistic and detailed, but still lacks a certain sense of authenticity that is only really present in real life. It looks fantastic nonetheless, and the scene is finished with some minor colour correction amongst smaller details such as dust particles and the character featured during the animation. The next scene that is broken down for us is a scene in which the main character is standing on a stone in the middle of a possibly man made river, with a small water fall behind it. This section did introduce me to something I had't seen demonstrated before and that is water particles, and the conversion to geometry. The first step was modelling the scene and playing the character in the correct place before a particle based water simulation is shown, which is then converted to geometry. Similar to the first scene onto the modelled environment a base texture is used before lighting, colour and other textures are layered and composited on top of each other. Going back to the first scene, a closer look at the way dust particles are created is given. This was fascinating to me personally as this is another aspect I just hadn't seen done before, but due to how common it is have wondered about before. For this, dust particles are simulated based on a 'stream' simulation which looks at airflow and how moving objects will affect this. The dust particle simulation is then replaced with the much smaller and more subtle reflective dust particles and added into the scene with the character and the setting. The hair is achieved using an interesting combination of layering 2D frame by frame animation and 3D computer generated animation in order to achieve a smooth and very good finished look. The elements of the hair are diffused and highlighted, as well as coloured with added line in order to make the efforts come together. The way these techniques are combined and demonstrated in the animation demonstrates to me how versatile animation can be, especially when combining different mediums and techniques. It also shows how certain techniques undertake certain tasks better than others. For example, this particular animator used 2D drawn animation to understand the way they wanted the hair to look, and then combined it with CG to finish it. The majority of these techniques are utilised and repeated in order to manufacture the other scenes in the animation. Overall, I thought this was an incredibly well crafted short piece of animation, and knowing the knowledge and skill that was funnelled into it makes me appreciate it even more. One of the biggest things I'll take away from it is the way different techniques across a broad spectrum of mediums even though they all come under animation can be used together to create something great if they need to be, and are as versatile as you can make them.
OUAN504 - MASSIVE
For one of my research tasks into the 3D animation industry and 3D as an industry, I've chosen to look at a piece of software a lot of people will have seen implemented in various media, but not heard of. 'MASSIVE' stands for 'Multiple Agent Simulation System in Virtual Environment' and is a high-end animation and artificial intelligence software package that's used for crowd generating visual effects in the film and television industry. The software itself was developed interestingly for Peter Jackson's 'The Lord of the Rings' when large crowds of soldiers and characters were required to fight in a battle setting. Up until this point the problem of crowds of this nature had not been solved, at least in terms of computer software so a developer named 'Stephen Regelous' created MASSIVE. Since this, it has developed into a complete product and has been licensed by a number of other visual effects houses.The main selling point of the software package is that it's able to create thousands or even millions by today's computer processing standards of individual characters or 'agents' all behaving and moving uniquely without having a team of animators spending a long time animating thousands of individual CG models. Furthermore, what I find personally quite amazing is that the software makes it so the individual agents or models interact uniquely with their surroundings, this includes other models. The reactions change the behaviour of the agent which is then controlled by pre-existing animation clips which are blended together in order to achieve a realistic behaviour. The pre-recorded animation clips can be obtained or created using motion capture, or even hand animated and then used as sources to use with the software. Aside from the AI properties of the software, there are a range of other features that MASSIVE possesses, including, cloth simulation, rigid body dynamics and graphics processing unit (GPU) based hardware rendering. Rigid-body dynamics looks closely at the movement of interconnected bodies under outside or external forces. The assumption that the bodies are rigid, which means that they don't deform when forces are applied. This simplifies the overall analysis by reducing the different parameters that describe the configuration of the system to the translation and rotation of reference frames attached to each individual body. I had to do some research into what rigid-body dynamics were as I hadn't looked into the information describing them until now.
Examples where MASSIVE has made an impact on the film industry is by encouraging the use of scenes and shots that just weren't possible before. In the words of Stephen Regelous, "You have to use the computer sometimes. For instance if you want 100,000 people in battle, you just can't go out and shoot that." Using Lord of the Rings as an example, during the introduction of 'The Fellowship of the Ring' there were some shots that featured 40,000 people. A huge number of agents and animated models all moving in synchronicity to emulate an epic battle scene. Speaking again in terms of Lord of the Rings as this is what the software was developed for just to show how well this software can work and how versatile it is, each solider in the battles that were shot had different soldiers which moved differently based on the weapons they had . For example, an Orc with a sword would react differently to an Orc with a spear, and this is all taken into account when the animation is filmed and when it's put through the software. Originally the first thing that was attempted using the software was making characters walk. This led to creator Stephen Regelous affectionately naming the software, 'plod'. However, the general consensus was that the software needed a more impressive name and so 'MASSIVE' was suggested - which eventually stuck.


The software package, MASSIVE has been implemented and used to create a number of crowd scenes in various high profile titles. These include;
Examples where MASSIVE has made an impact on the film industry is by encouraging the use of scenes and shots that just weren't possible before. In the words of Stephen Regelous, "You have to use the computer sometimes. For instance if you want 100,000 people in battle, you just can't go out and shoot that." Using Lord of the Rings as an example, during the introduction of 'The Fellowship of the Ring' there were some shots that featured 40,000 people. A huge number of agents and animated models all moving in synchronicity to emulate an epic battle scene. Speaking again in terms of Lord of the Rings as this is what the software was developed for just to show how well this software can work and how versatile it is, each solider in the battles that were shot had different soldiers which moved differently based on the weapons they had . For example, an Orc with a sword would react differently to an Orc with a spear, and this is all taken into account when the animation is filmed and when it's put through the software. Originally the first thing that was attempted using the software was making characters walk. This led to creator Stephen Regelous affectionately naming the software, 'plod'. However, the general consensus was that the software needed a more impressive name and so 'MASSIVE' was suggested - which eventually stuck.
The software package, MASSIVE has been implemented and used to create a number of crowd scenes in various high profile titles. These include;
- The Lord of the Rings
- Rise of the Planet of the Apes
- Avatar
- The Chronicles of Narnia: The Lion, the Witch and the Wardrobe
- King Kong (Jackson, 2005)
- Carlton Draught: Big Ad
- Mountain, a television commercial for the PlayStation 2 console
- I, Robot
- Category 7: The End of the World
- Blades of Glory
- Eragon
- The Mummy: Tomb of the Dragon Emperor
- Happy Feet
- 300
- Buffy ("Chosen")
- Doctor Who ("Partners in Crime")
- Changeling
- Speed Racer (Car A.I. and crowds)
- WALL-E
- Up
- Life of Pi (Both the flying fish and Meerkat sequences were created with the help of Massive)
- The Hobbit
OUAN504 - Opening & Closing Credits
To complete our project and give it a finished touch, I suggested to Wing that we create title sequences similar to the way a lot of animation studios do it and create stand alone pieces of art work to accompany the titles and credits. For this we could create some relatively simple pieces of artwork to support our story and ultimately introduce the animation in a nice way and complete it in a similar way. I thought of using a couple of pieces from the production stages in combination with a couple of things I did during the production process when I felt like I needed a break from modelling for example, and just do something less taxing. I looked quickly at some other opening and closing credit combinations and realised that opening credits are never usually as long as opening credits, so I thought it would be best to save the art work for the end and just have a title at the beginning. I plan to have the title at the beginning on the black sky with the moon and written in a crisp white font.
I've been undertaking a couple of small illustrations based on this project and want to use these as backgrounds for the closing credits at the end of the animation. The credits will include mine and Wing's names along with what jobs we undertook during the process. I hope this, despite not being the main feature, will increase the quality of the overall piece further and improve the audience's experience. My original idea was to have artwork of the pigs in the barn and around the farm setting before the production and almost as a consolation after the main feature show the pigs in different locations as a small nod towards the idea that they did eventually escape and these are the adventures they had. At this point in the process however this was meant to be a finishing touch and because it was so close to the animation deadline, I decided to reel it back a little and just feature these at the end of the animation. Another point to make, is that after I thought about it, I felt like having all of this imagery thrown at you before the animation even starts would be a bit overwhelming, so that when the actual animation comes on the audiences attention may already be occupied and their eyes aren't as 'fresh'. This idea could of worked quite well if the animation was longer, or a feature film perhaps but if its around the same time as the main feature, I just don't think it would have been a good decision. Below is the kind of simplistic art work I wanted to accompany the credits for the animation.
The final opening titles and closing credits we went this looked like this. We didn't want the combination of the opening and closing titles to be close to the length of the animation so we put them at the end, and just featured a title at this beginning.
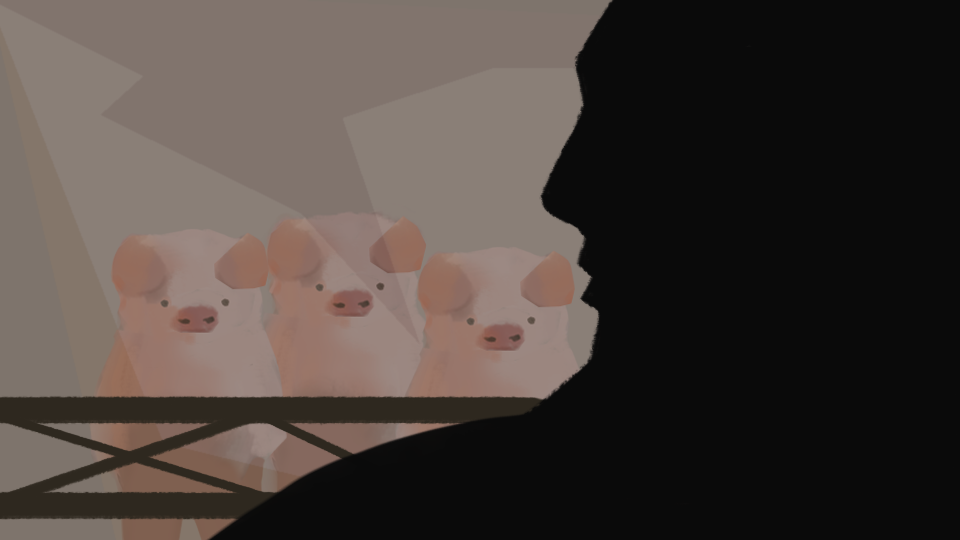
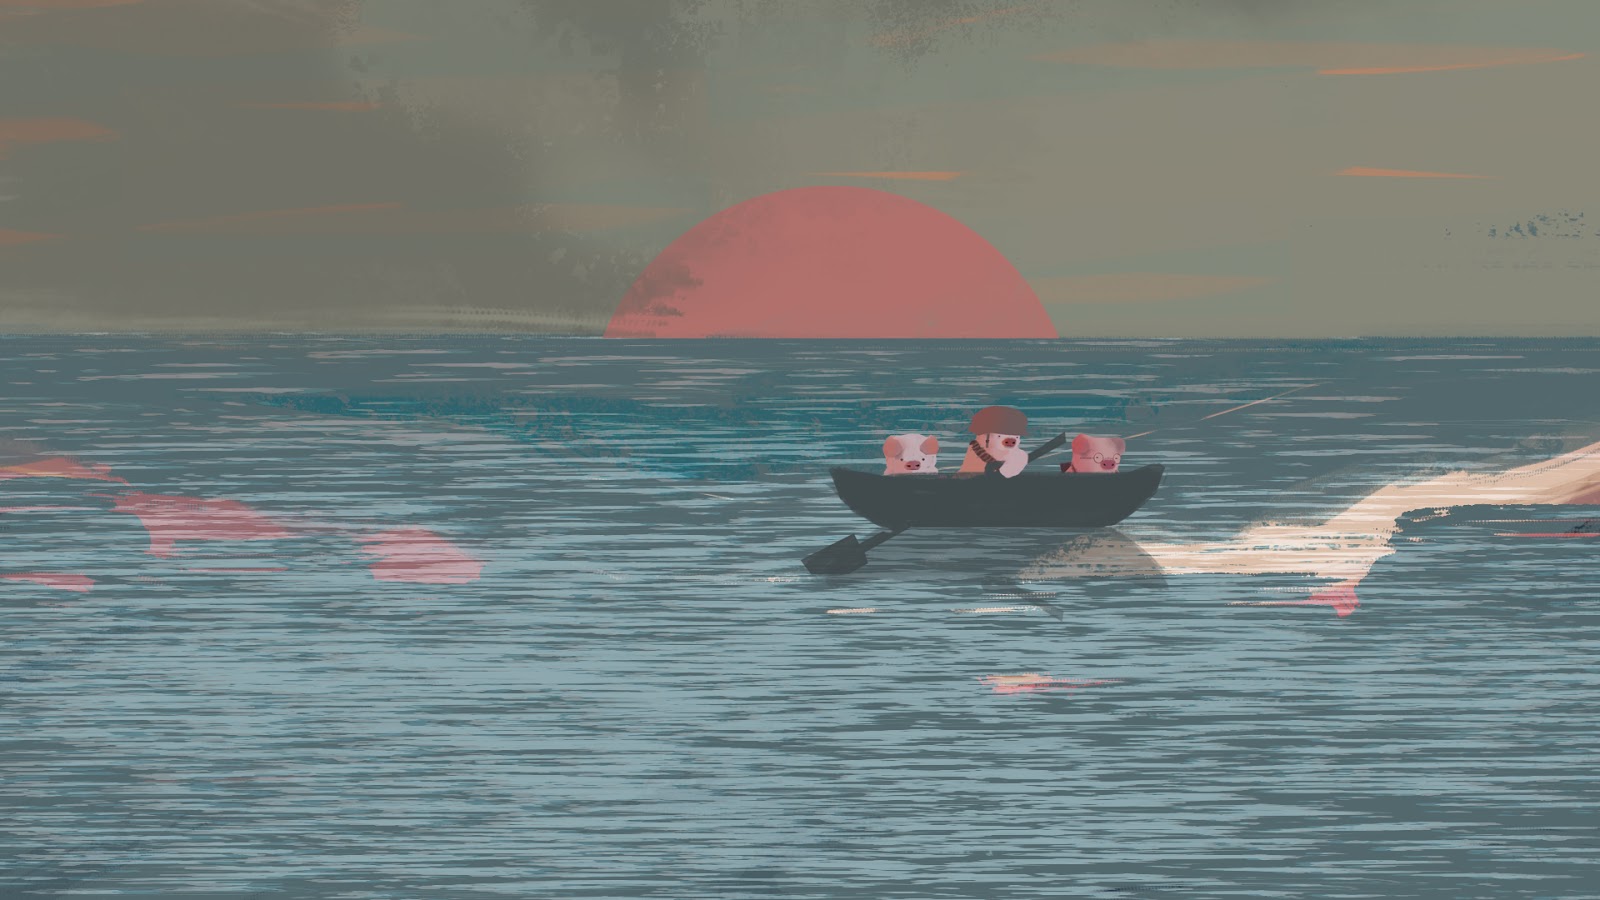
OUAN504 - Post Production, Colour Correction & Final Touches
As the project went on Wing and I had several ideas in mind for things we wanted to include in our animation, but would have been quite difficult or unnecessary to do through Maya, and so we left them for the post production stage and planned to use After Effects to achieve them. I had a short list of things I wanted to do, and once the animation was fully rendered and sequenced together along with the music in Premiere Pro, I took it into After Effects to add the finishing touches.
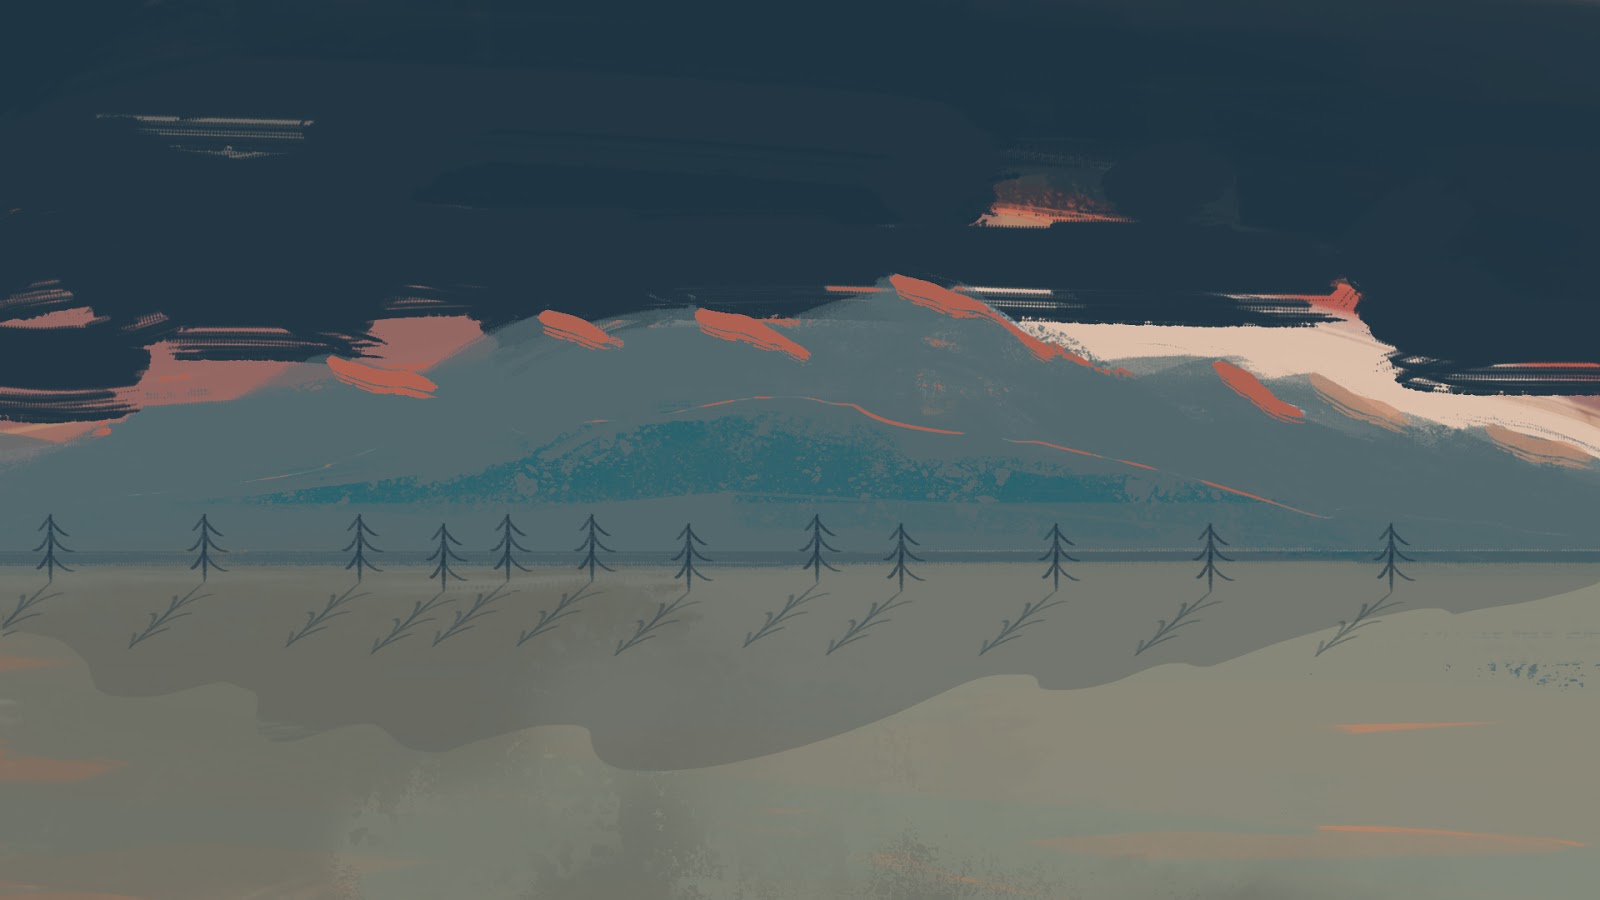
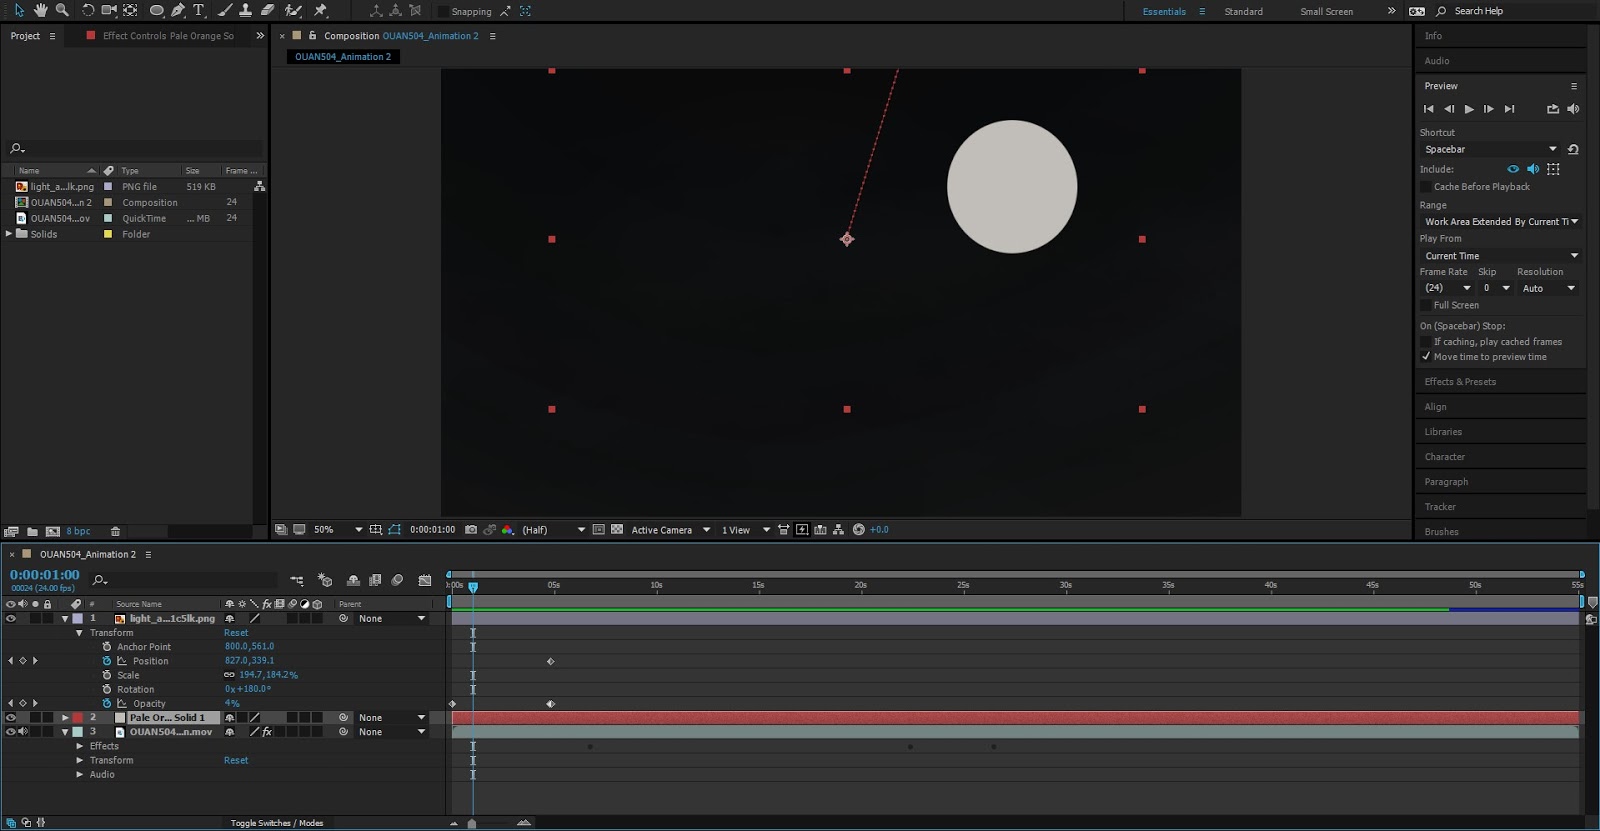
The first scene is the opening scene and the establishing shot. For this the only things I really want to add was the moon, which was what the shot pans down from and some atmospheric fog or mist to give a sense of volume and depth to the scene. I think details like this also increase the level of interaction or immersion the audience feels with the scene because of the subtle details. This was done in quite a 'rough and ready' way, I didn't have much time to complete the post production stage and so this was done by key framing the objects as they moved to coincide with the camera moving, hopefully it looks quite smooth in this sense.
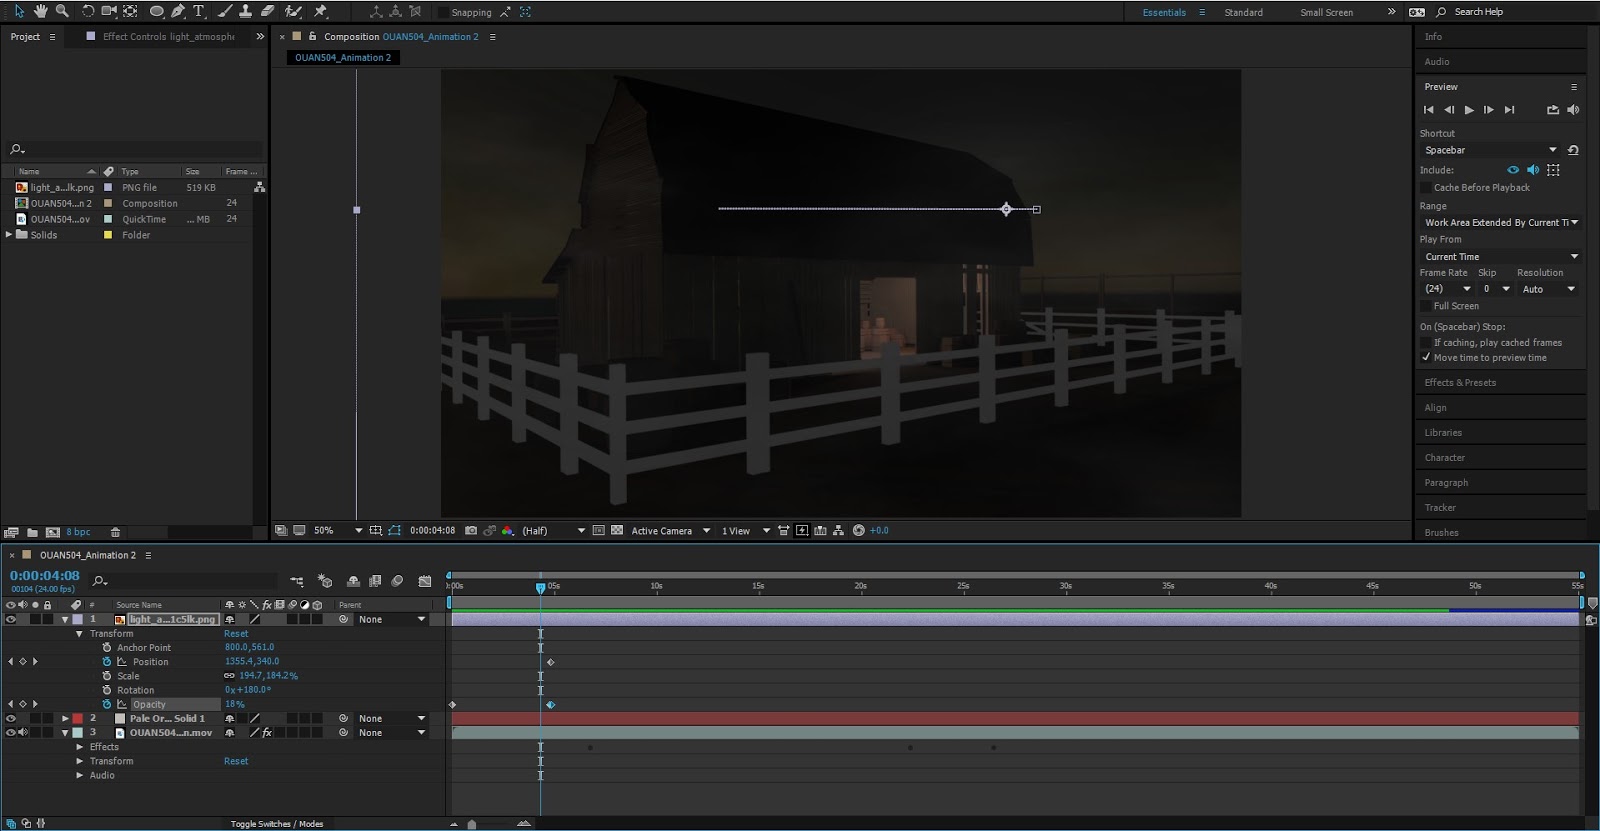
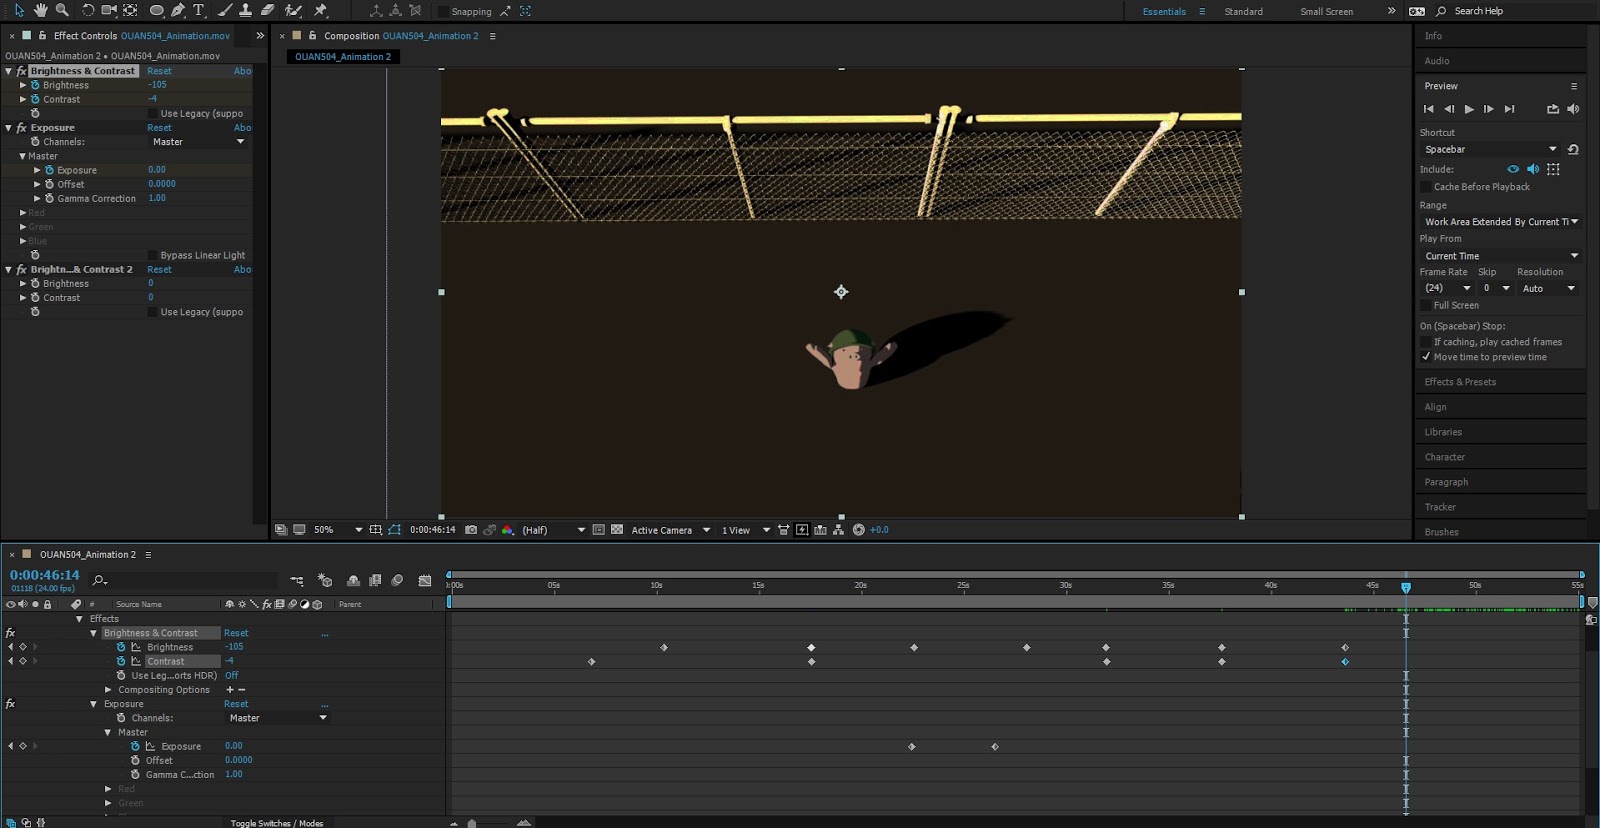
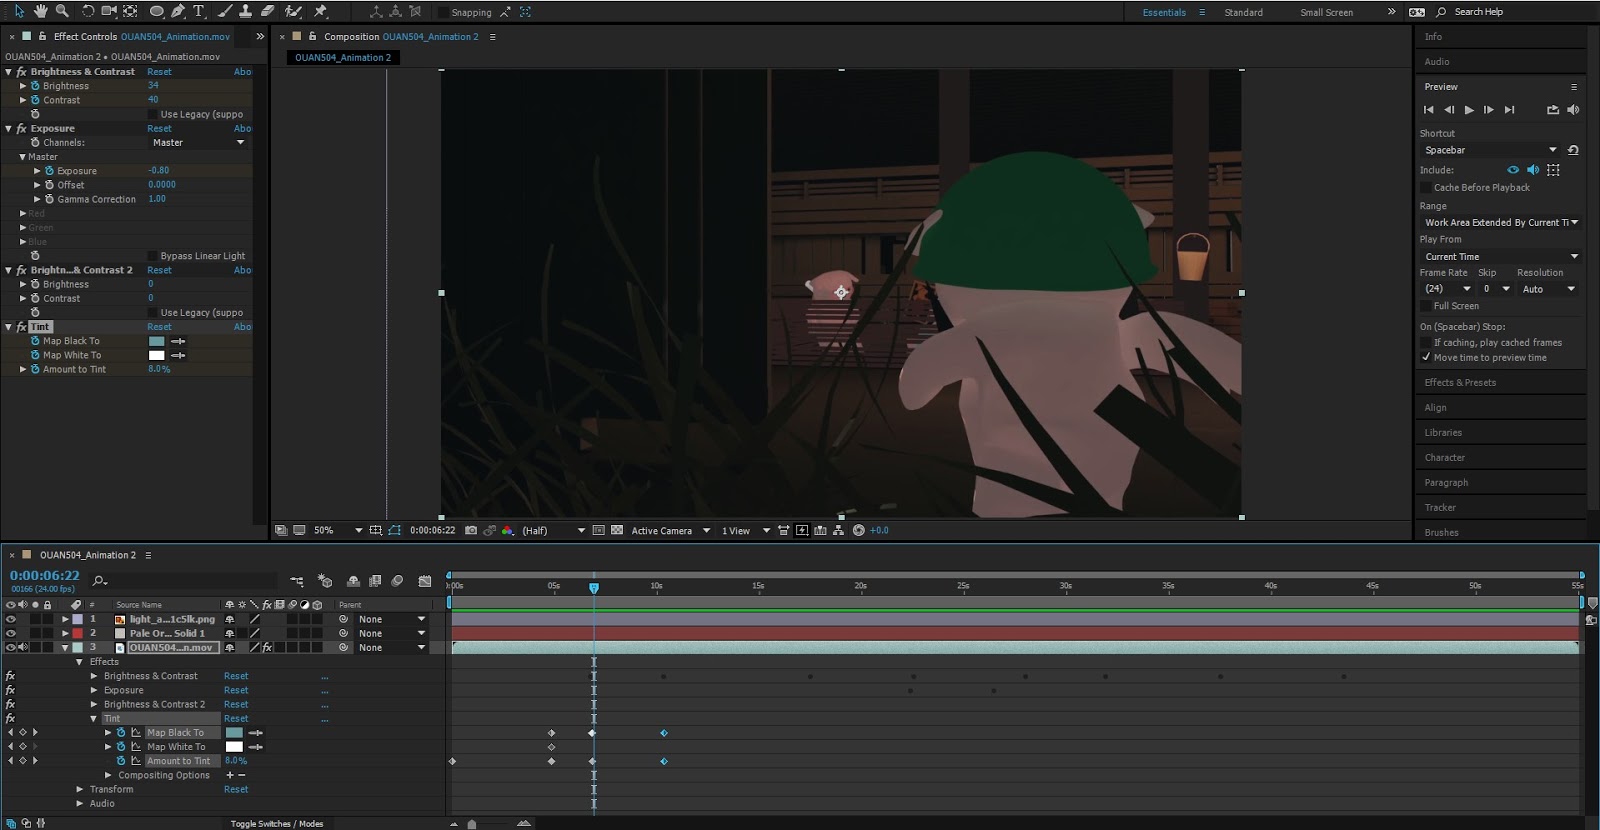
I think it quite's difficult to achieve the exact lighting you want in Maya, especially with a lot of conflicting light sources whether they are from the physical sun and sky, or artificial light bulbs. Due to this I took the time to make some simple colour adjustments on various scenes. I used the tint feature to add a sense of blue and green lighting to some scenes which felt too warm in terms of lighting, and had too much of an orange glow to them. Furthermore, scenes that felt too blue or green in colour, I added some red and orange tints to even them out further. Finally, after looking at scenes individually I felt that some were either a little too bright or a little too dark. To counter this I played around with the brightness and contrast, as well as the curves tool in order to make the levels in the scene a little more easy to look at whilst still retaining their purpose and atmosphere.
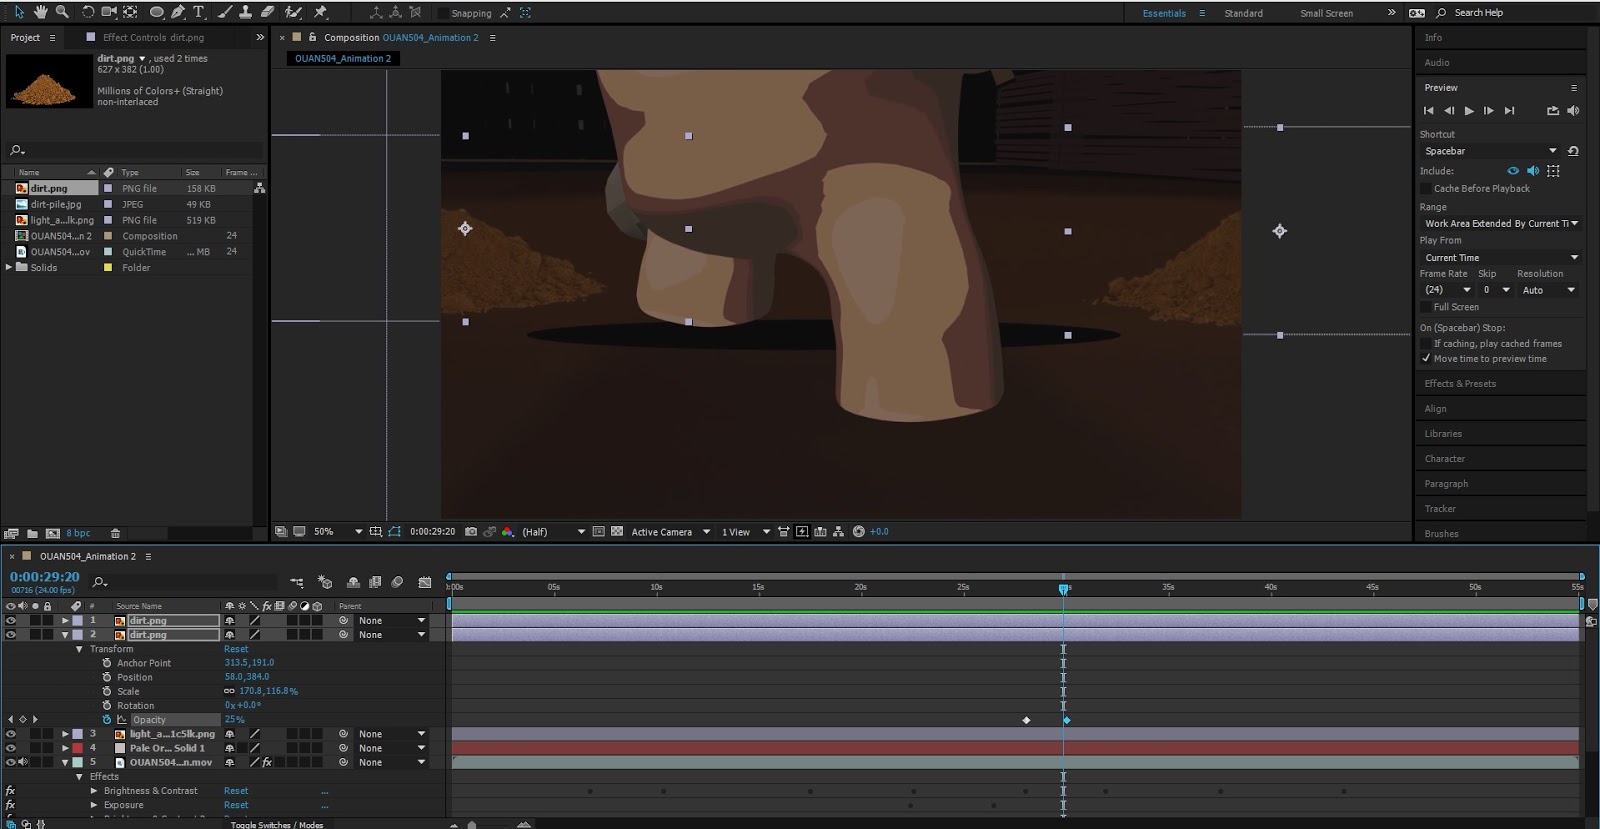
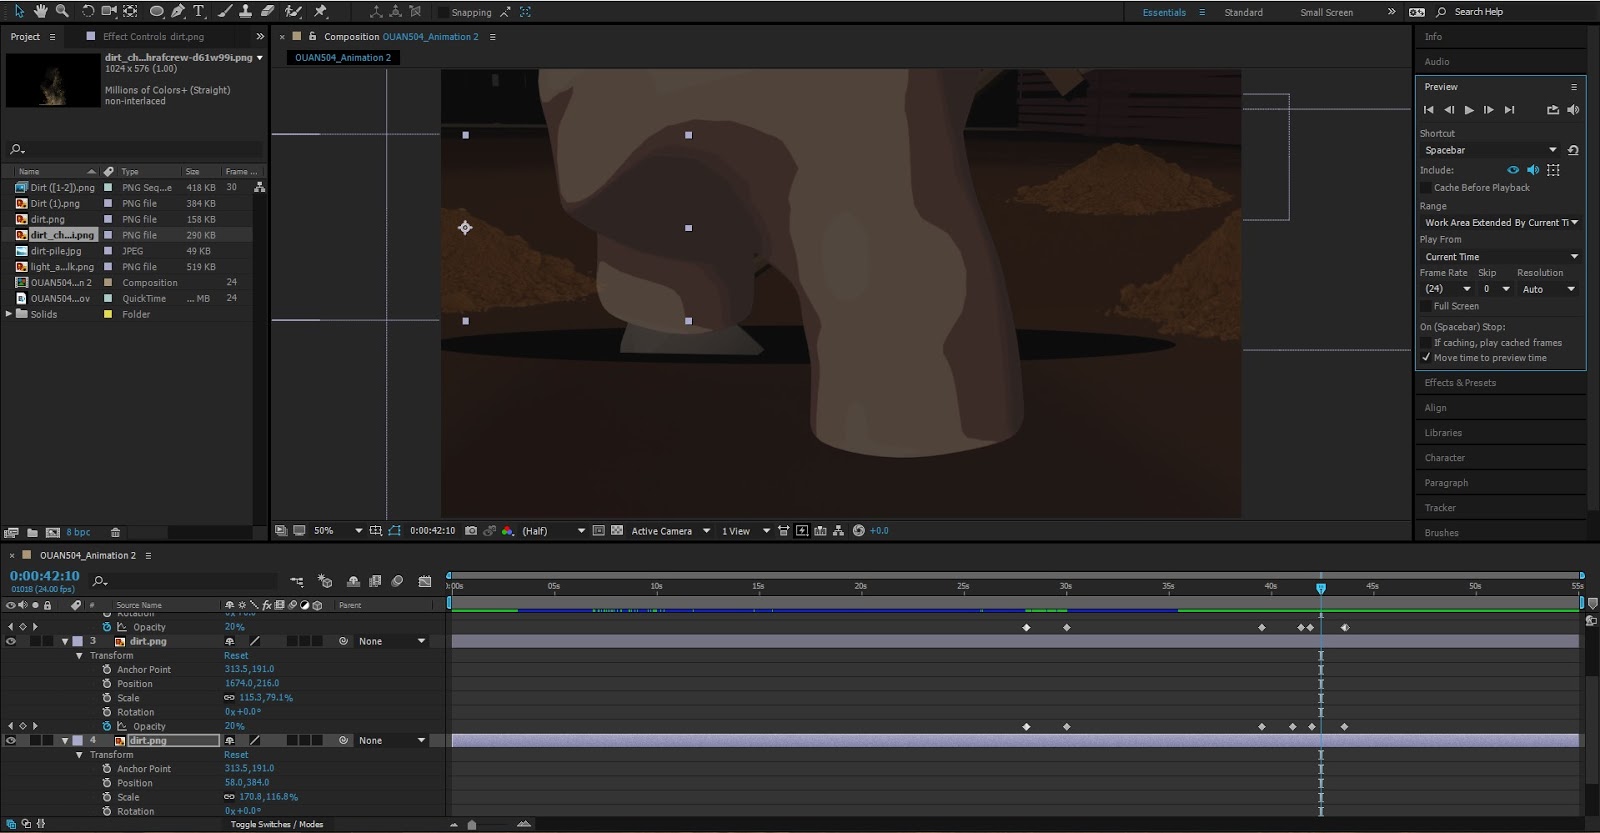
Something that made sense to include but would have been more trouble than it's worth to do in After Effects was the dirt created by the spade and the digging that takes place in our story. At our interim crit we discussed this idea with the class and the general consensus was that it would be best to add the finer details such as this in After Effects, in order to save time - so that's what we did. I took some simple free to use PNG images of dirt from the internet and used the scale and other various tools to position the dirt where it looked good. I included it in the shots where the pig is digging close up so it looks like the piles of dirt are piling up around him. The last thing I had to do to these was alter the opacity of the dirt images using key frames. This was so that it is only featured in the scenes that it is appropriate. After a bit of time this scene was complete and I was happy with the post-production process we had done to the animation.
The first scene is the opening scene and the establishing shot. For this the only things I really want to add was the moon, which was what the shot pans down from and some atmospheric fog or mist to give a sense of volume and depth to the scene. I think details like this also increase the level of interaction or immersion the audience feels with the scene because of the subtle details. This was done in quite a 'rough and ready' way, I didn't have much time to complete the post production stage and so this was done by key framing the objects as they moved to coincide with the camera moving, hopefully it looks quite smooth in this sense.
I think it quite's difficult to achieve the exact lighting you want in Maya, especially with a lot of conflicting light sources whether they are from the physical sun and sky, or artificial light bulbs. Due to this I took the time to make some simple colour adjustments on various scenes. I used the tint feature to add a sense of blue and green lighting to some scenes which felt too warm in terms of lighting, and had too much of an orange glow to them. Furthermore, scenes that felt too blue or green in colour, I added some red and orange tints to even them out further. Finally, after looking at scenes individually I felt that some were either a little too bright or a little too dark. To counter this I played around with the brightness and contrast, as well as the curves tool in order to make the levels in the scene a little more easy to look at whilst still retaining their purpose and atmosphere.
Something that made sense to include but would have been more trouble than it's worth to do in After Effects was the dirt created by the spade and the digging that takes place in our story. At our interim crit we discussed this idea with the class and the general consensus was that it would be best to add the finer details such as this in After Effects, in order to save time - so that's what we did. I took some simple free to use PNG images of dirt from the internet and used the scale and other various tools to position the dirt where it looked good. I included it in the shots where the pig is digging close up so it looks like the piles of dirt are piling up around him. The last thing I had to do to these was alter the opacity of the dirt images using key frames. This was so that it is only featured in the scenes that it is appropriate. After a bit of time this scene was complete and I was happy with the post-production process we had done to the animation.
OUAN504 - Sound Design
There has been a lot of consideration regarding the sound design for this particular animation. Based on what I learnt last year during the applied animation module I certain piece of music or well crafted sound design can be the factor that changes a good piece into a great piece. In some respects I consider the sound design to be as important as the visuals when the two are combined, and they have to work together to create something better than either could of been on their own. I've spent some time trying to work out what would work best with this animation because there is a section that consists of a montage like sequence which could work really well the correct music. In contrast to that, there are scenes where I think more realistic sound effects would be appropriate to contrast to the faster paced montage scene. Scenes such as the bouncing ball scene and the intro sequence would work well this some more ambient foley sounds. So perhaps a combination of the two could be in order to create the best sound design possible for the animation.
In terms of planning for the different sounds throughout the animation I feel like it's been swayed heavily and directed by the choices Wing and I have made as progression was made throughout the production process of the project. For example, during my exploration of the introductory sequence where the animation opens when a shot of the moon and then eases downwards to a shot of the barn from a three-quarter behind view, I thought that as the setting and time of day is night on a farm it would be mostly quiet. Except, perhaps for the sound of a breeze or crickets rife throughout the grassy areas depicted in the scene. In terms of viability it would be relatively easy to find recording or samples of this kind of sound online from a free source, and it would be a subtle addition to the ambience of the scene.
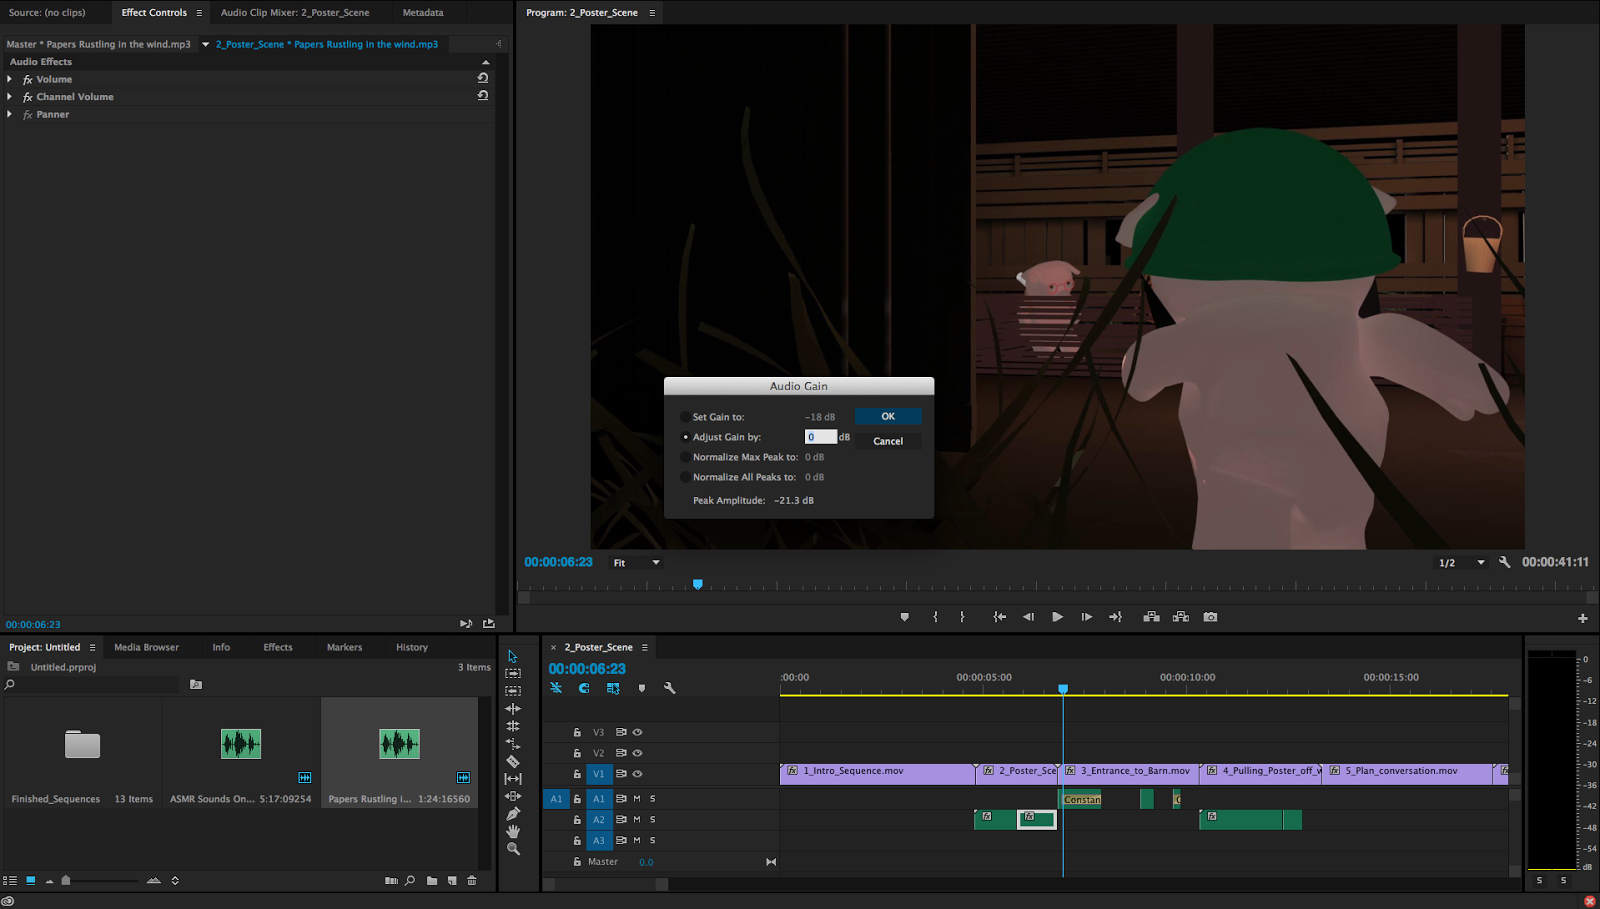
It was important to me to find the right song for the montage section in the middle of the animation. If we decided a song would be the best way to approach the sound for this section then I wanted the sound to add to the scene not take away from it. Hence why it was important to get the best and most fitting track as we could. There were several sound effects in which we thought would be nice to have in the animation, such as footsteps the sound of the shovel and the ground along with the sound of dirt. Wing found a perfect clip on youtube of someone tapping their fingers on various objects close to a microphone, I went through it and around 6 minutes into the video they make a heavy 'thudding' sound with their fingers which could work really well with the footsteps and the feel of the characters when their feet hit the floor to move. Furthermore, we both looked at the 'Youtube sound library' which contains a lot of free sounds for pretty much anything you can think of, and several versions of each. We looked at sound related to shovelling and digging along with the sound of different earthy materials like dirt and grit. I always find it quite difficult to obtain good sound, so for this project I was tempted to try and record our own sounds to fit our needs. However, as the time pressed on towards the end of the project it was obvious to us that it would be best to use royalty free sounds and concentrate mostly on the animation side of things so that we have a finished animation at the end of the project. These were obtained using the sound library on Youtube, and was used for sound effects such as the rustling of paper in the wind, and elements of the wind itself, as well as various dirt and shovel sounds.
The first sound clip I used was the tapping of the finger tips to emulate the sound of foot steps hitting the ground. I took the clip into Audacity and increased the level of bass as well as doing some noise reduction and general cleaning up of the sound so it was a goof fit for the scene. The original clip was around 15 minutes long so I listened to it and found the best 1 minute or so, or the minute of sound that I thought most closely resembled the footsteps of the character. I exported the file and imported it back into Premiere Pro to sync it up with the video. It took a little bit of time to match up the individual footsteps but in the end it worked out quite well. I used the same method for the sound of the character jumping and landing on the other side of the sty fence. I also include some subtle fades in the sound to make it sound as if it tapered off very quickly as a sound of this nature would. Next I downloaded the sound of paper rustling off the youtube sound library and added that into the Premiere Pro project. I played around with the volume to make it match up better with the way the poster in the animation is rustling. It isn't particular fast and so I changed the volume and length of the clip based on this factor in both of the scenes the poster is featured being affected by the wind. The final step for this sound was adding some fades and transitional elements to it, in order to make it seem like it was a little further away from the audience in terms of the volume of the sound. Finding the correct volume of individual sounds and their relationship with other was vital when it came to finding the balance. I put a big emphasis on the sound effects before the music starts to give the audience a sense of authenticity and weight with the combination of movement and sound. I think this set the montage scene well as the audience had a sense of how things sounded, and my concern before this was that the audience would only have the movement as a reference for weight and the general environment if we had only used music for the entire piece. Every time I created and implemented a sound I played the piece back through to make sure the volume height didn't reach the red but that it was at a happy medium in the top half of the mixer. I wanted the levels to be clear and audible but not too brash.
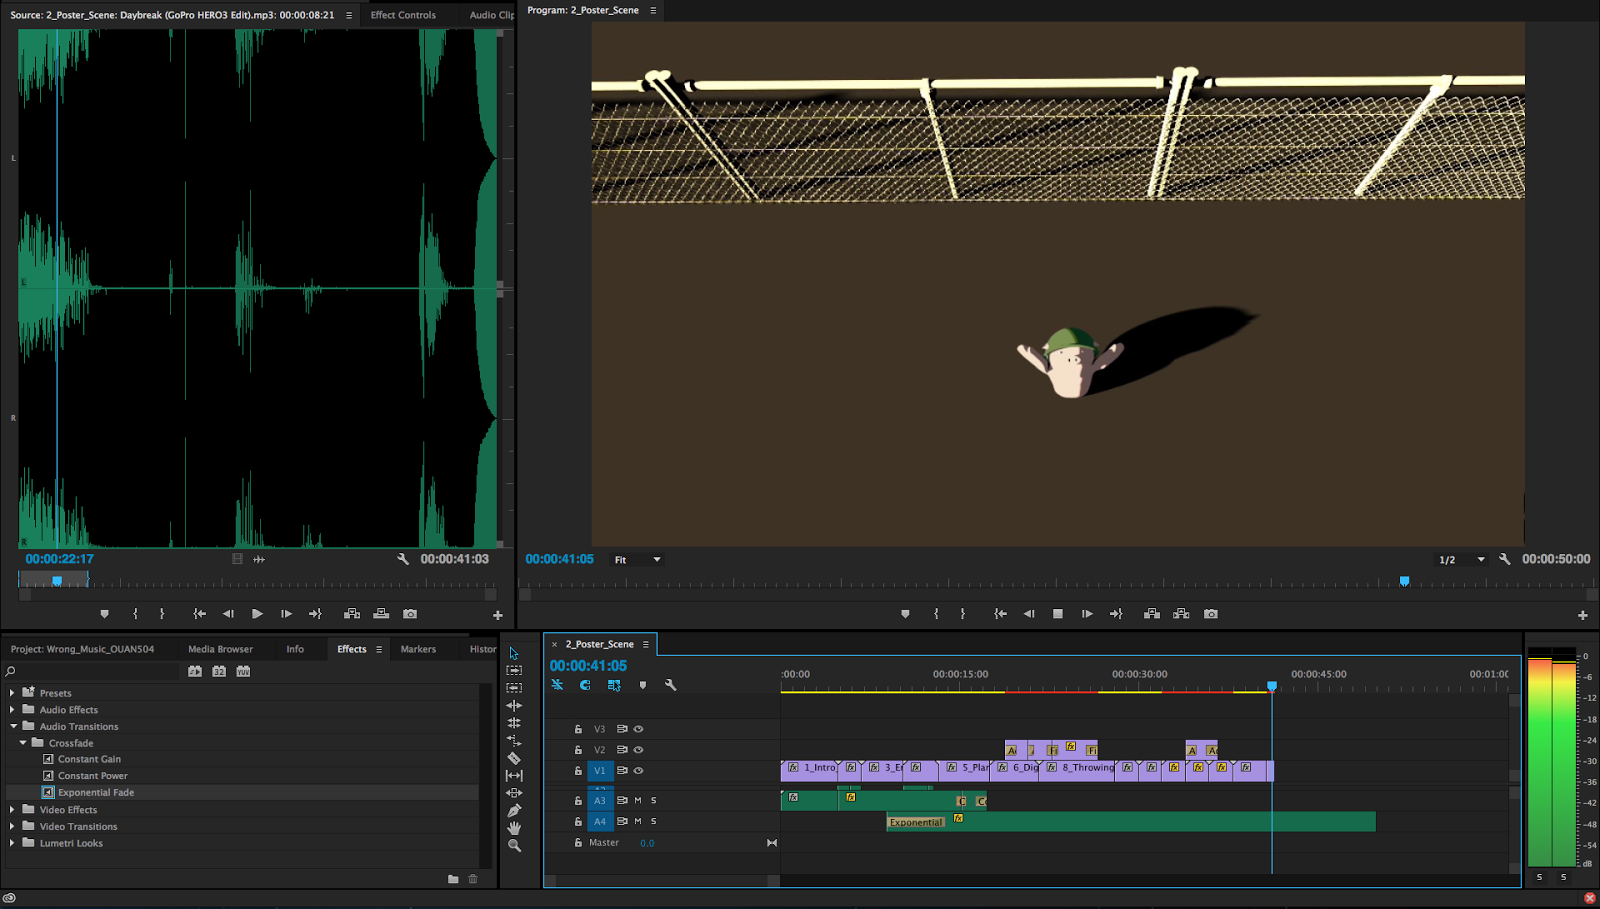
The music we used for the montage sequence was the original music we used in the animatic from the beginning of the project, so I'm glad we could stick with that until the end. I found that speeding the music up slightly adds a lot of drama and tension to the scene due to the quick pacing. I'm pleased that the original music worked this well with the original story board, animatic and now the final animation. Perhaps I could have found an even better piece somewhere or combined different pieces of music similar to the way I've combined different scenes but due to time constraints I think this was a little bit unrealistic.

In terms of planning for the different sounds throughout the animation I feel like it's been swayed heavily and directed by the choices Wing and I have made as progression was made throughout the production process of the project. For example, during my exploration of the introductory sequence where the animation opens when a shot of the moon and then eases downwards to a shot of the barn from a three-quarter behind view, I thought that as the setting and time of day is night on a farm it would be mostly quiet. Except, perhaps for the sound of a breeze or crickets rife throughout the grassy areas depicted in the scene. In terms of viability it would be relatively easy to find recording or samples of this kind of sound online from a free source, and it would be a subtle addition to the ambience of the scene.
It was important to me to find the right song for the montage section in the middle of the animation. If we decided a song would be the best way to approach the sound for this section then I wanted the sound to add to the scene not take away from it. Hence why it was important to get the best and most fitting track as we could. There were several sound effects in which we thought would be nice to have in the animation, such as footsteps the sound of the shovel and the ground along with the sound of dirt. Wing found a perfect clip on youtube of someone tapping their fingers on various objects close to a microphone, I went through it and around 6 minutes into the video they make a heavy 'thudding' sound with their fingers which could work really well with the footsteps and the feel of the characters when their feet hit the floor to move. Furthermore, we both looked at the 'Youtube sound library' which contains a lot of free sounds for pretty much anything you can think of, and several versions of each. We looked at sound related to shovelling and digging along with the sound of different earthy materials like dirt and grit. I always find it quite difficult to obtain good sound, so for this project I was tempted to try and record our own sounds to fit our needs. However, as the time pressed on towards the end of the project it was obvious to us that it would be best to use royalty free sounds and concentrate mostly on the animation side of things so that we have a finished animation at the end of the project. These were obtained using the sound library on Youtube, and was used for sound effects such as the rustling of paper in the wind, and elements of the wind itself, as well as various dirt and shovel sounds.
The first sound clip I used was the tapping of the finger tips to emulate the sound of foot steps hitting the ground. I took the clip into Audacity and increased the level of bass as well as doing some noise reduction and general cleaning up of the sound so it was a goof fit for the scene. The original clip was around 15 minutes long so I listened to it and found the best 1 minute or so, or the minute of sound that I thought most closely resembled the footsteps of the character. I exported the file and imported it back into Premiere Pro to sync it up with the video. It took a little bit of time to match up the individual footsteps but in the end it worked out quite well. I used the same method for the sound of the character jumping and landing on the other side of the sty fence. I also include some subtle fades in the sound to make it sound as if it tapered off very quickly as a sound of this nature would. Next I downloaded the sound of paper rustling off the youtube sound library and added that into the Premiere Pro project. I played around with the volume to make it match up better with the way the poster in the animation is rustling. It isn't particular fast and so I changed the volume and length of the clip based on this factor in both of the scenes the poster is featured being affected by the wind. The final step for this sound was adding some fades and transitional elements to it, in order to make it seem like it was a little further away from the audience in terms of the volume of the sound. Finding the correct volume of individual sounds and their relationship with other was vital when it came to finding the balance. I put a big emphasis on the sound effects before the music starts to give the audience a sense of authenticity and weight with the combination of movement and sound. I think this set the montage scene well as the audience had a sense of how things sounded, and my concern before this was that the audience would only have the movement as a reference for weight and the general environment if we had only used music for the entire piece. Every time I created and implemented a sound I played the piece back through to make sure the volume height didn't reach the red but that it was at a happy medium in the top half of the mixer. I wanted the levels to be clear and audible but not too brash.
The music we used for the montage sequence was the original music we used in the animatic from the beginning of the project, so I'm glad we could stick with that until the end. I found that speeding the music up slightly adds a lot of drama and tension to the scene due to the quick pacing. I'm pleased that the original music worked this well with the original story board, animatic and now the final animation. Perhaps I could have found an even better piece somewhere or combined different pieces of music similar to the way I've combined different scenes but due to time constraints I think this was a little bit unrealistic.
OUAN504 - Sequencing the Scenes
It was fun to put all of the finished scenes together in a sequence and see them in their raw format. The story seemed to link up quite well after all of the work we put in, and I took the opportunity to shorten some of the scenes that went on for too long. If we could have done this again, I think certain scenes could have been approached a little differently. The time-lapse scene could have been shown over a shorter time span making the change in lighting not seem so harsh, and I think some of the digging scenes could have looped for another action or two so that there more of an emphasis on the work the pigs were putting into the escape, and the amount of digging they were doing throughout the duration of the story. Having used Premiere Pro before I felt fairly comfortable completing basic editing tasks such as shorting and lengthening scenes by stretching them, clipping and removing sections of footage and re-arranging them to find the optimal sequence of footage. The terms of stages in the production, I always find the post-production section quite challenging similar to the other areas of production, but satisfying in the respect that the main bulk of the work is done and you have something you can fine tune and work away at to make as good as it can be. I see this as the first stage in that process.
When we first started this process there were a couple of scenes still left to be fully rendered, but in order to make the most of the time we had, we divided some of the rendering up to be completed as soon as possible and continued on with the final stages of the production. This included the aforementioned sequencing along with sound design and general discussion about the remaining tasks we had to complete. The time I spent in Premiere Pro sequencing the material together gave me an opportunity to play around with any timings and transitions that we felt could work or be appropriate in enhancing the quality of the final animation.
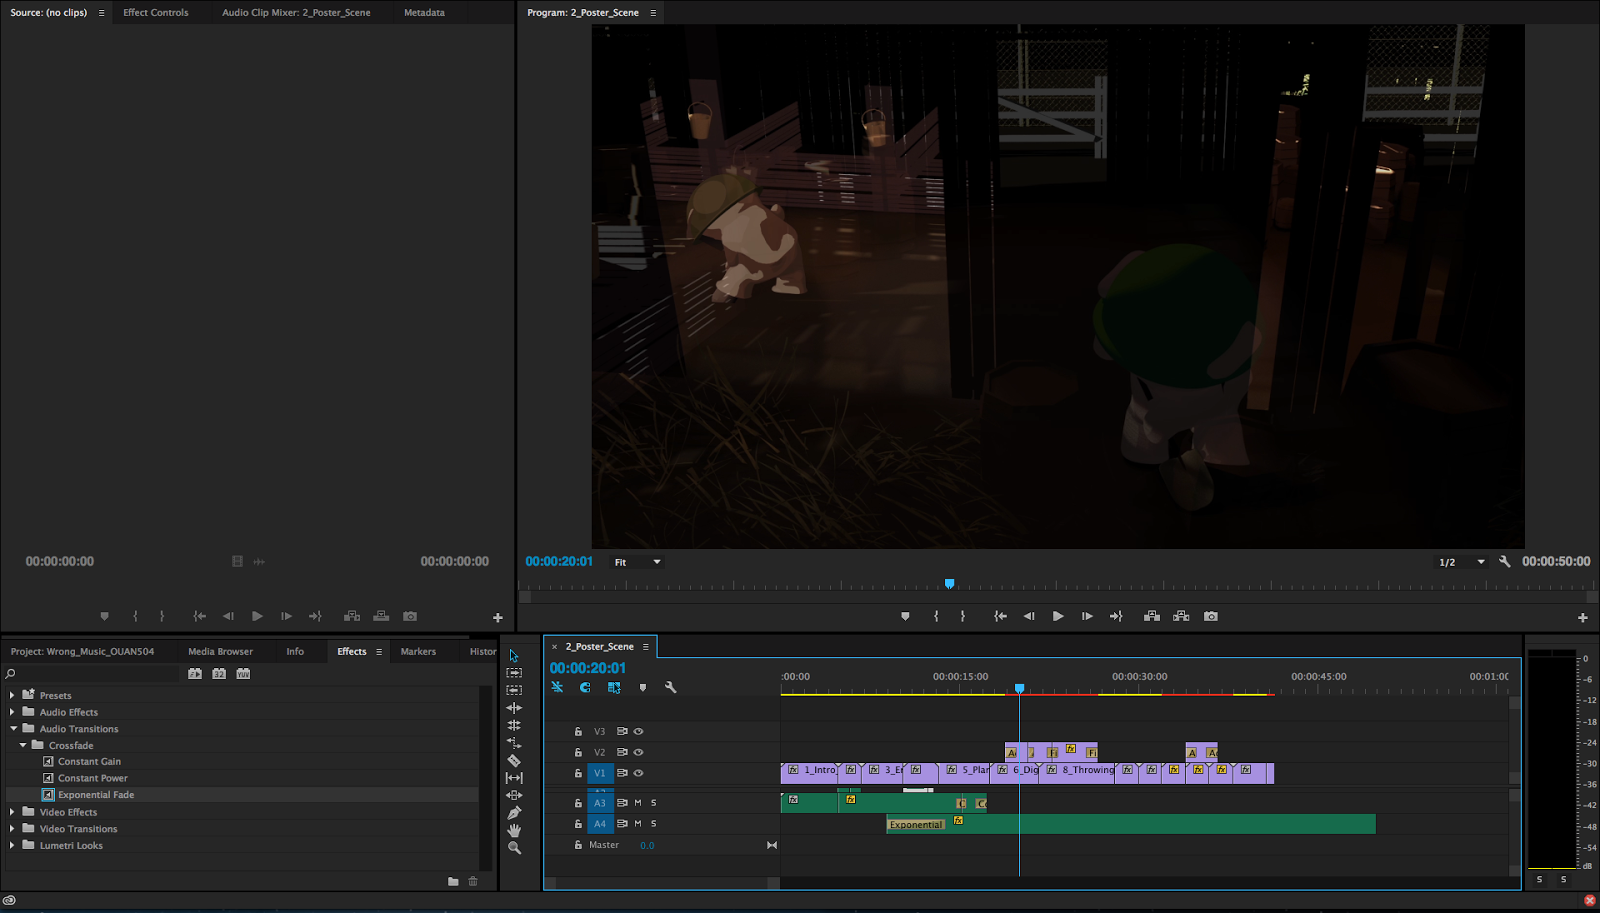
The final module of the first year showed me the potential of overlapping and fading when combining scenes together. This is done using the transition and effects function in Premiere Pro. During the initial ideal and development stage of this project Wing and I discussed the idea multiple times with Sara and Mat about including a montage like sequence, and that it would be a good idea to represent this visually by overlapping footage and layering scenes onto of each other to show the hardship of the pigs. This also is a good representation of the passage of time throughout the animation, and I think is a feature that a lot of people can recognise and understand. I played around extensively with the different scenes and even took the opportunity to repeat several of them because they look a lot different when they're obscured during the layering of different scenes. Wing and I looked closely at which scenes worked best when overlapped and how to repeat certain scenes such as the digging sequences, in a way which didn't look like the same scene over and over. This included different transitional fades, different perspectives and orientations, done by flipping the footage. It was a tough stage in the production because time was pressing on and we had to work relatively quickly, if I had more time for this section I would have utilised the footage in a much more inventive way to make sure it was the best it could be. I enjoyed this experience as it gave me an opportunity to be quite creative with the way we presented our work in the final animation, and hopefully worked well from a technical standpoint. This was done by positioning certain parts of footage in different areas of the screen during the overlap.
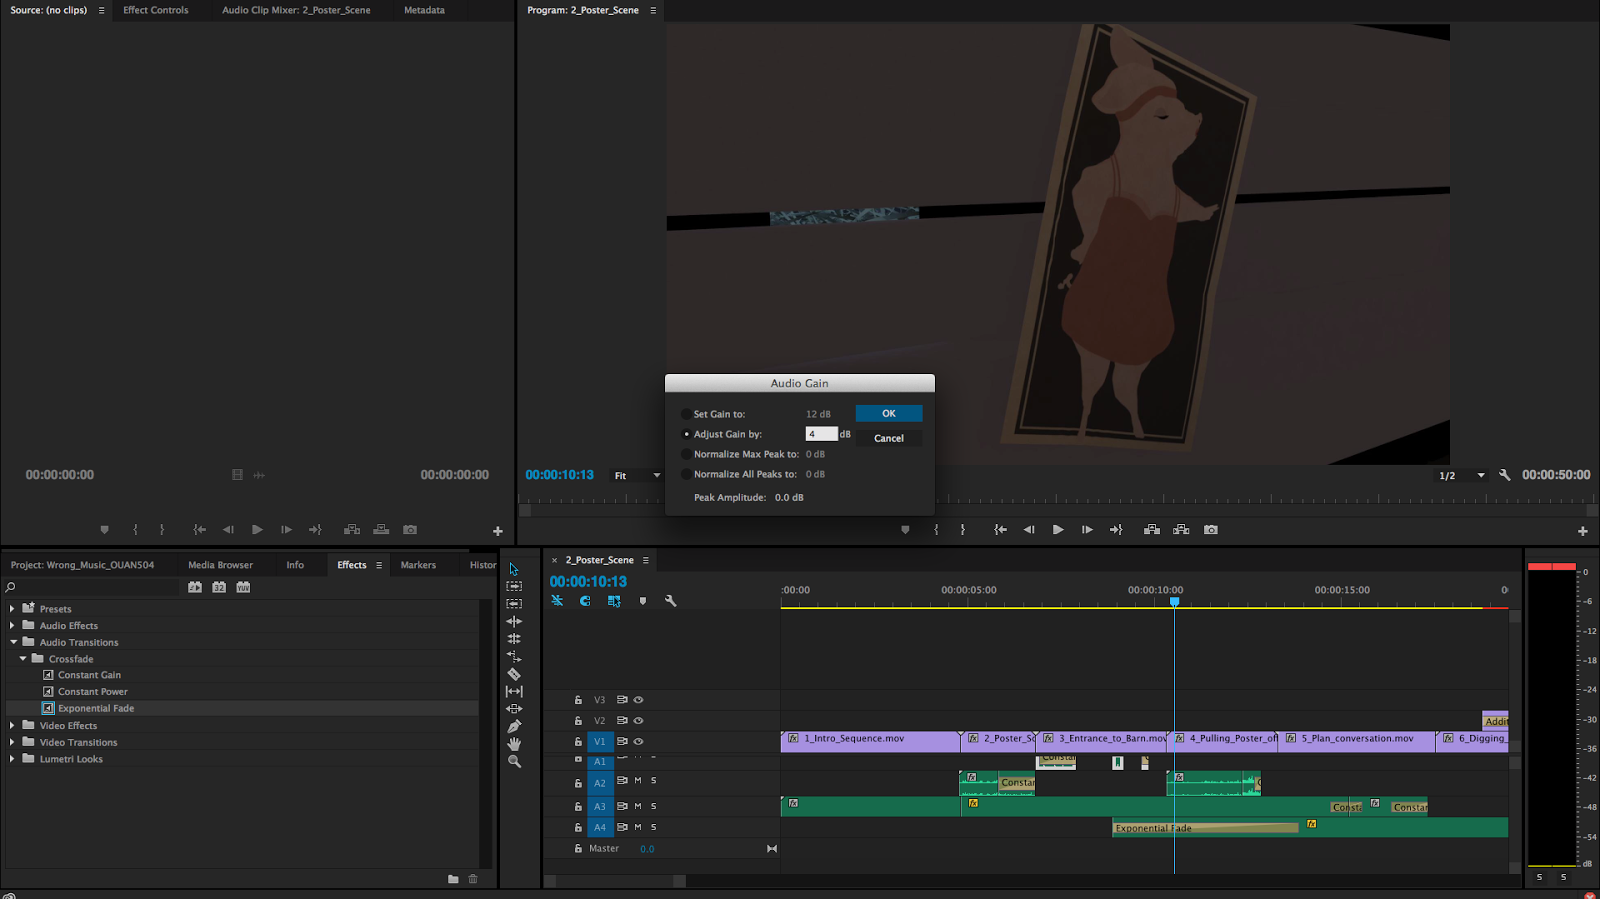
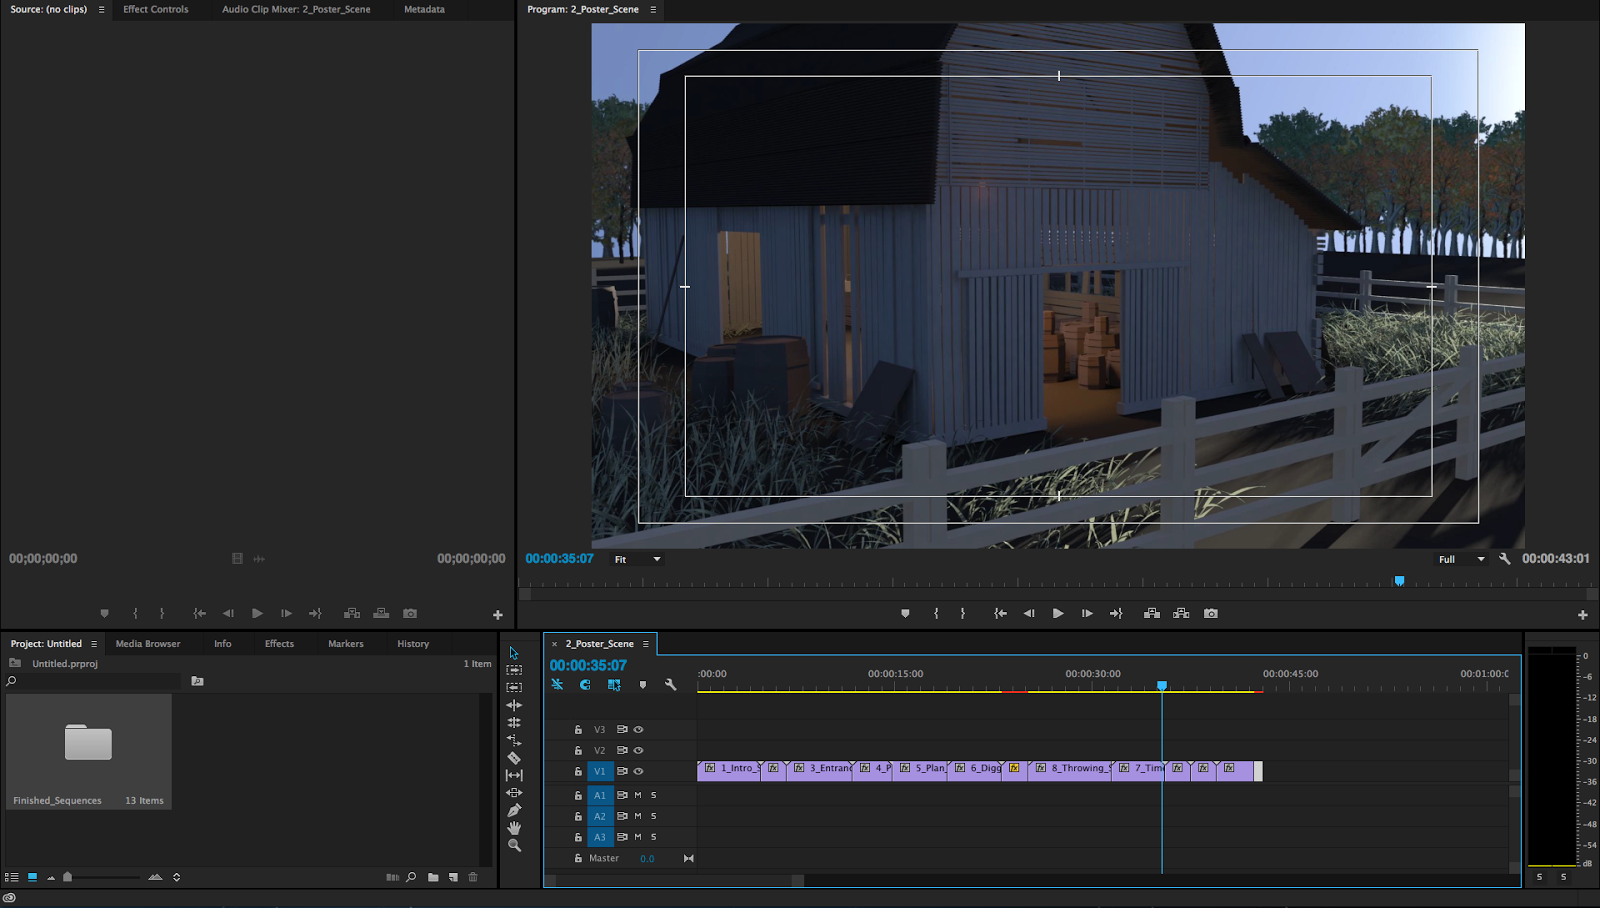
I spoke to Mat briefly about what I was doing and he said it was a good way to use the footage when it came to recycling and reusing sections in different ways, especially since it took such a long time to render relative to the length of the project. This gave me some confidence in what I was doing and that it was okay to manage and sequence footage in this way. There is also a scene in the second half of the animation where a character walks outside, and in the final version the scene is quite blown out, making the scene look quite white in parts. This was caused by rendering a scene without realising that there was a problem with the lighting. However, it was too late in the project to amend this. It would be first priority if we were allocated more time because it does affect the consistent coloration of the animation.
When we first started this process there were a couple of scenes still left to be fully rendered, but in order to make the most of the time we had, we divided some of the rendering up to be completed as soon as possible and continued on with the final stages of the production. This included the aforementioned sequencing along with sound design and general discussion about the remaining tasks we had to complete. The time I spent in Premiere Pro sequencing the material together gave me an opportunity to play around with any timings and transitions that we felt could work or be appropriate in enhancing the quality of the final animation.
The final module of the first year showed me the potential of overlapping and fading when combining scenes together. This is done using the transition and effects function in Premiere Pro. During the initial ideal and development stage of this project Wing and I discussed the idea multiple times with Sara and Mat about including a montage like sequence, and that it would be a good idea to represent this visually by overlapping footage and layering scenes onto of each other to show the hardship of the pigs. This also is a good representation of the passage of time throughout the animation, and I think is a feature that a lot of people can recognise and understand. I played around extensively with the different scenes and even took the opportunity to repeat several of them because they look a lot different when they're obscured during the layering of different scenes. Wing and I looked closely at which scenes worked best when overlapped and how to repeat certain scenes such as the digging sequences, in a way which didn't look like the same scene over and over. This included different transitional fades, different perspectives and orientations, done by flipping the footage. It was a tough stage in the production because time was pressing on and we had to work relatively quickly, if I had more time for this section I would have utilised the footage in a much more inventive way to make sure it was the best it could be. I enjoyed this experience as it gave me an opportunity to be quite creative with the way we presented our work in the final animation, and hopefully worked well from a technical standpoint. This was done by positioning certain parts of footage in different areas of the screen during the overlap.
I spoke to Mat briefly about what I was doing and he said it was a good way to use the footage when it came to recycling and reusing sections in different ways, especially since it took such a long time to render relative to the length of the project. This gave me some confidence in what I was doing and that it was okay to manage and sequence footage in this way. There is also a scene in the second half of the animation where a character walks outside, and in the final version the scene is quite blown out, making the scene look quite white in parts. This was caused by rendering a scene without realising that there was a problem with the lighting. However, it was too late in the project to amend this. It would be first priority if we were allocated more time because it does affect the consistent coloration of the animation.
Sunday, 6 December 2015
OUAN504 - Every Frame a Painting, Research
'Every Frame a Painting' is a series of video essays produced by editor and film maker Tony Zhou. The essays cover specific features that can be seen in film and are usually explained through the work of directors and film makers that excelled in certain areas as described on a video to video basis. I have been watching and learning through these videos about some areas of film, mainly due to my pre-existing interesting the art of film and breakdowns of techniques and styles which in turn led me to find this particular series. Not only have I found them incredibly interesting, entertaining and helpful in my own practice, but I've attempted to utilise them further through this project. Since discovering them this is the first 'long' project we have been given through a module and it seemed like a good opportunity to apply some the principles discussed in these videos. Even if I've only considered them during the process, I wanted to encourage myself to be consciously aware of what I was doing on a scene to scene basis, without affecting instinct or personal preference for example. Some of the mos helpful and in my opinion useful for this project that I could find, were the four videos below.
Composing Movement
Firstly, I wanted to focus on movement. I wanted to make sure not a single scene passed without some form of movement, excluding camera movement. I wanted the audience's attention to be grabbed from the beginning of the production and during the one minute animation in which the story takes place it was ideal for me to give the audience something to look at and focus on. Making sure to manipulate the direction in which they are looking and the objects they are looking at. It was mentioned in the video that Japanese director, 'Akira Kurosawa' uses weather in his scenes in order to set the tone of the scene and reflect and empathise on characters emotions and dictate the atmosphere in the film. He does this through use of snow, rain, fire, smoke, fog and wind. It would be unreasonable and detrimental to the production to go this far, but I definitely think a certain ambience could be achieved and a level of detail added through the use of weather, in particular perhaps; fog, wind and possibly smoke or rain. There are several establishing shots and environmental shots where this could be applied, especially in combination with the important using of day and night throughout the animation. It also means that I want objects in shots that would other wise be still or stationary to move, either affected by the weather, by a character interacting with them or otherwise. Furthermore, when it comes to movement I wanted to make sure the characters had interesting and dynamic movement - and do interesting things. I have included one scene where a pig vaults the fence around a pig sty, and I found this kind of movement in the scene much more interesting than just a walk or run cycle for example. As well has having characters move in an interesting way I wanted the characters movement to interact and flow in sync with one another. I suppose this is more of a point based around realism and just general interest in a scene but I think the movement of individual characters when combined together can change the impression of a scene on the audience dramatically.
The Geometry of a Scene
This video again revolves around a film by Akira Kurosawa. Specifically the film 'The Bad Sleep Well' (1960). This video looks closely at a scene involving three characters and the way they interact in a particular instance, with some interaction and some dialogue. This was relevant to my project and my work mostly due to the fact there is three characters, however the principles involved could be applied to a multitude of different scenarios. I learnt a lot about staging and character interaction during this example and furthermore it was compared to some other scenes from other films that have a similar set up but perhaps haven't executed it as well, or in such an interesting way. The 'Geometry' of the scene relates to the way the story of the scene is told (of course with the help of props and acting) through the camera, and the set up of the characters throughout the duration. The shapes made throughout the scene were worth looking at closely and as there were three characters, a triangle works well in making a scene more interesting to the audience. I attempted this particular set up in the scene where my three characters discuss their plans with the camera shooting from above. I thought the triangle formation I created was quite appealing, and worked much better than if I had for example just shot each characters actions shot by shot. The way this was set up in mine and Wing's animation showed the interaction of characters in their environment a long with the props, which in turn hopefully told the scene well, and in an interesting way to the audience.
Editing Space and Time
This video looks closely at the work of Japanese film maker, Satoshi Kon. Who interestingly has delivered incredibly strong imagery across his work and has influenced film makers like Darren Aronofsky and Christopher Nolan. The main themes of his films include the way people live multiple lives occasionally through fantasy. What I learn from this video, and what had the biggest effect on me was the way in which he edits his films. Editing is something that I want to utilise to make the sequence of the scenes in mine and Wing's production the best they can be, and of course encourage the delivery of the narrative to be the best it can be. The way in which Satoshi Kon has done this is using techniques such as; use black frames to jump cut, objects to wipe the frame and rewind scenes. Of course these must be used sparingly and backed with thought, but the kind of inventive methods that have been applied in his films in order to confuse and create interest with the audience is something that I want to attempt to emulate in our animation. If I can achieve anything note worthy or interesting with the use of editing and the infinite ways sequences can be strung together in a counter-intuitive like Satoshi Kon does throughout his work I will be happy. I think what I like about this type of editing is it catches the audience off guard and allows for more fluid storytelling and transitions between scenes. It would be good if we could create smooth and seamless transitions of a similar nature to increase the flow of the story, especially since it's an especially short animation.
Visual Comedy
I think mine and Wing's animation and story by nature is one that contains humour. The characters are anthropomorphic pigs, trying to break out of a barn and the animation ends with a punchline. From the beginning the concept we had has concerned me in the sense that firstly, I've never created anything based around humour and comedy before and also, I want to make the delivery of the punchline as strong as possible. I looked at this video focused on visual comedy to help me find the best way to achieve this. This video looks specifically at Edgar Wright - a director I really like in order to illustrate a good example of a director that uses a full range of what is possible. The principles displayed in the video suggest that comedy has to be inventive and has to be told in an interesting and unsuspecting way to make the audience appreciate it. Furthermore, comedy can be achieved by what's out of the frame. Using a simple cut or pan to bring in the punch line is an effective way of producing comedy on screen. Another few things listed that I want to consider and use where I can include; things entering the frame in funny ways, people leaving the frame in funny ways, well timed sound effects, action synchronised to music and overly dramatic lighting. Hopefully I can utilise the frame in a way where the comedy is communicated effectively.
OUAN504 - Animating, Characters Discussion
As one of the last scenes I had to work on personally, I was relatively used to the way I was working and this was one of the easier efforts in terms of animation and camera work. I had in mind a shot from above, like an aerial view slowly moving further away revealing more of the scene. This was a fairly simple set up and contrasted to some of the more complex and dynamic scenes that Wing and I had set up. During the scene the characters use action to present to the audience the idea that they are deliberating and discussing something, the use of the map in the centre of the shot reveals to the audience enough information to recognise what's going on. The intention was that after this slow pan shot, it would cut to the more fast paced and highly contrasted scene of the 'strong' character digging in the barn with a spade. The previous shot to this was a character grabbing the poster off the wall so hopefully this should reveal the fact that the 'plan of escape' is written on the reverse side, as hinted in the first posted scene where the reverse side is revealed. I spent some time making sure the scene read well and that the characters were in appropriate locations, with the smaller pig in the centre looking between the two other characters as the scene goes on, as if they were listening to the 'higher ups' or the wiser characters. Furthermore, this is a subtle form of character development in that the audience will recognise the relationship between the characters and the roles they play within themselves. Even if the whole story is revealed within a one minute time frame.
Due to the subtlety of the motion in the scene I did want to make it as natural as possible, and hopefully less mechanical or robotic. I tried to include as much overlapping action as necessary to achieve this as well as thinking carefully about how the different characters interacted during the short sequence. Thinking about the limitations of this scene, as others, if I had more time I would have created a much more dynamic and realistic scene. Perhaps including the characters passing the map between them and moving around more instead of moving their arms and head but pretty much standing in the same place. This also goes for if the animation itself was longer. In a sense this has enabled me, and encouraged me to think carefully and be as economical as I could in terms of making sure each scene and the action that takes place within it is communicated effectively to the audience. Early on in the production, it became apparent to Wing and I that one of the main challenges with the production of this animation would be making sure despite the complex story (given the time we were allocated) we would have to develop every aspect with the intention of making the story apparent to the audience in every way possible. This is where the simplicity of the movement, the shot that focuses entirely on the action intended to move the narrative forward and finally, the use of characters, props and staging to encompass the premise of the scene in just a few seconds.
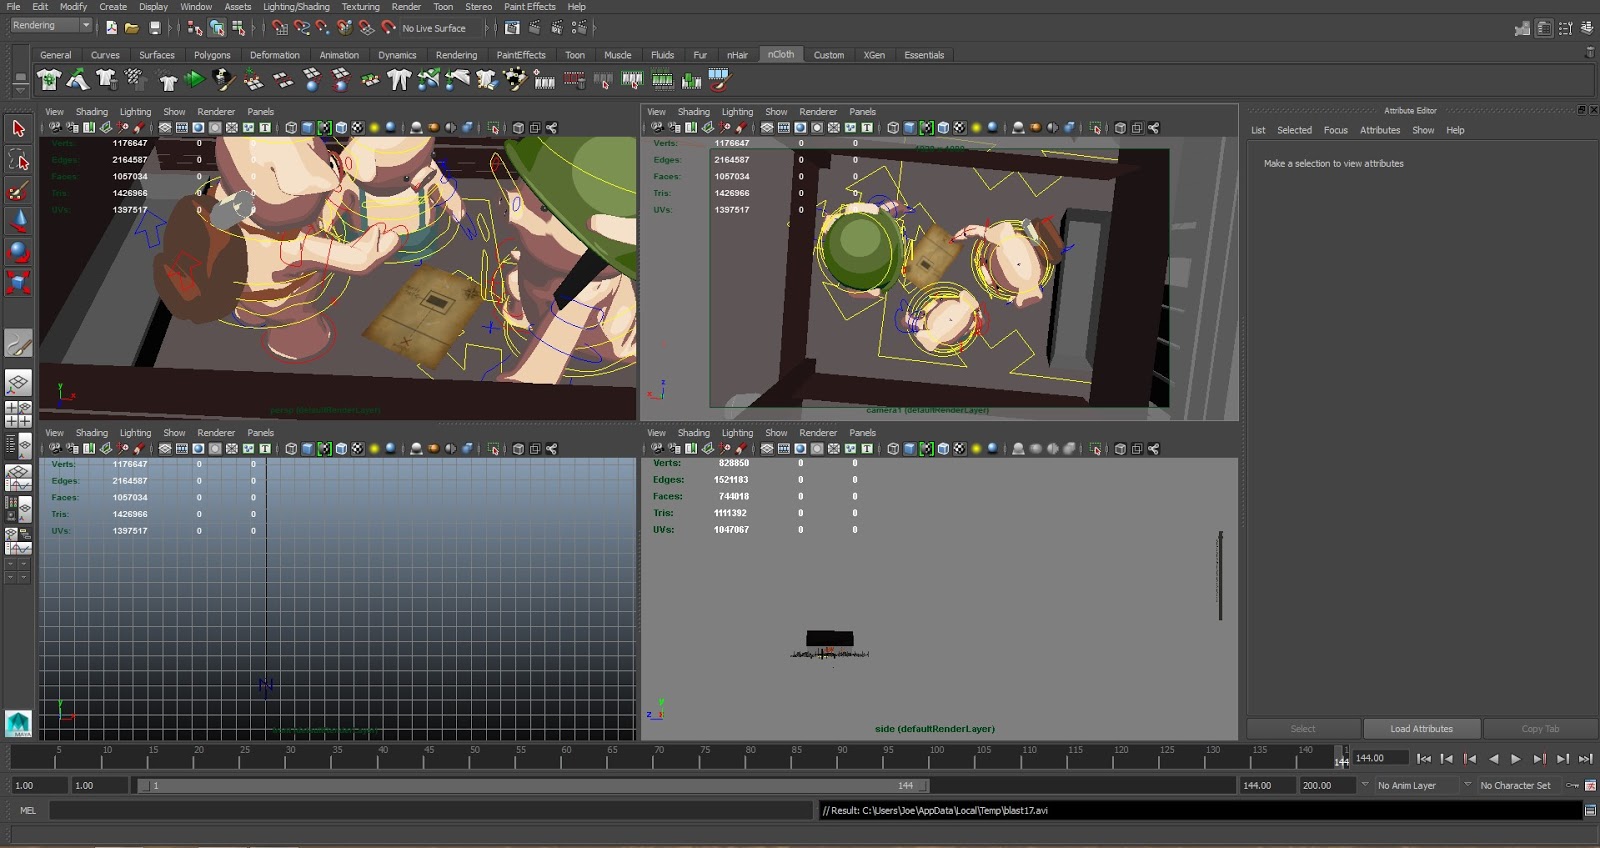
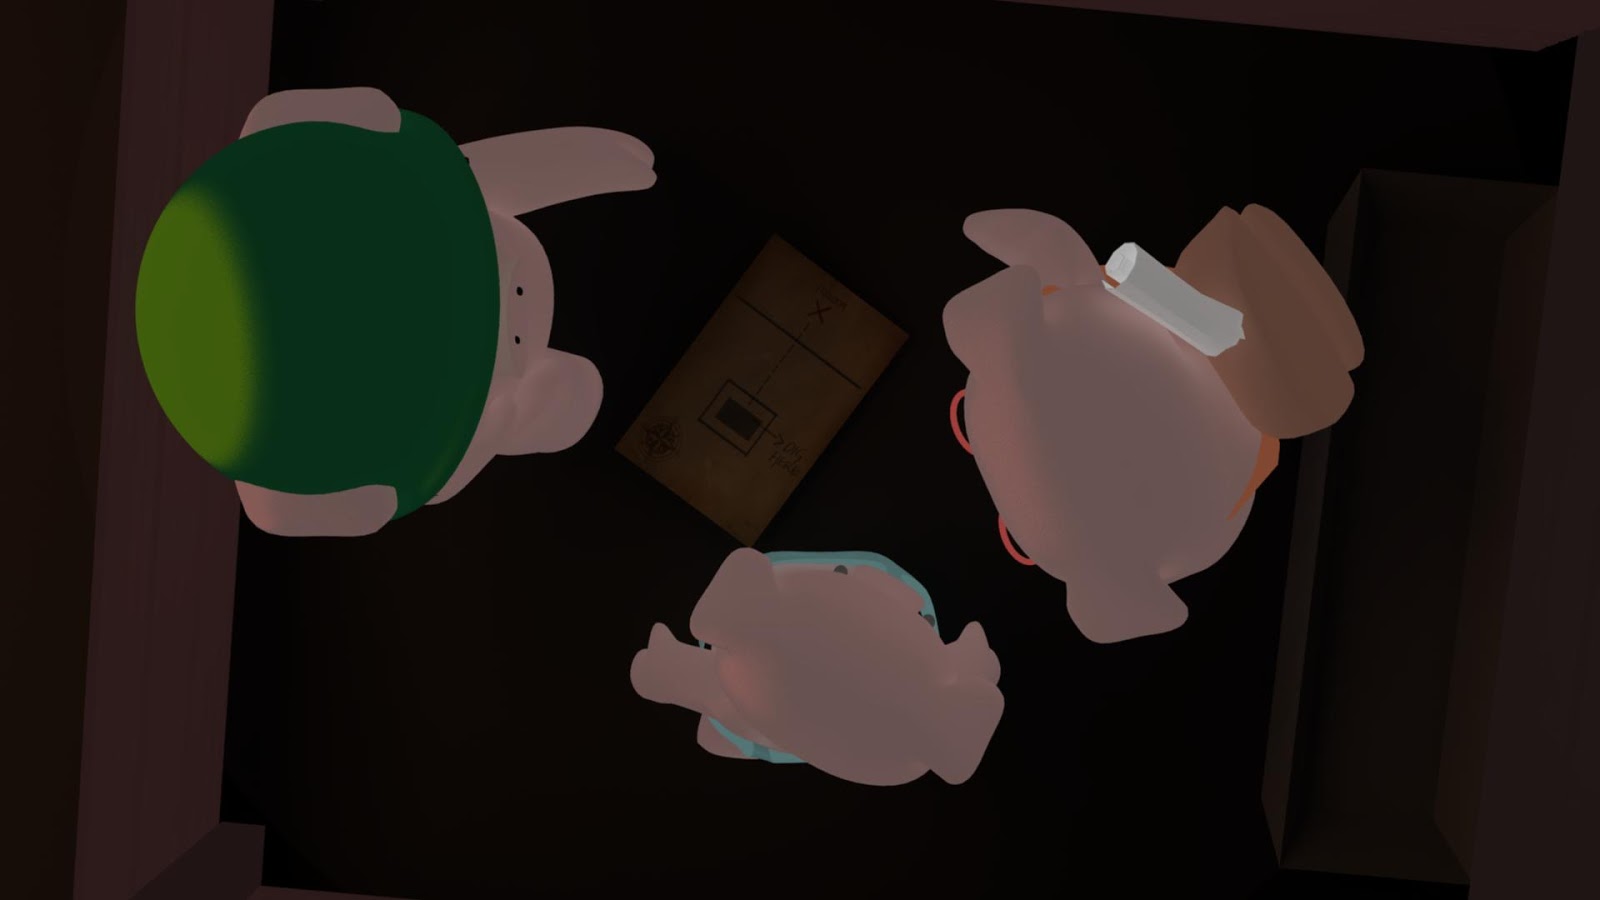
Due to the subtlety of the motion in the scene I did want to make it as natural as possible, and hopefully less mechanical or robotic. I tried to include as much overlapping action as necessary to achieve this as well as thinking carefully about how the different characters interacted during the short sequence. Thinking about the limitations of this scene, as others, if I had more time I would have created a much more dynamic and realistic scene. Perhaps including the characters passing the map between them and moving around more instead of moving their arms and head but pretty much standing in the same place. This also goes for if the animation itself was longer. In a sense this has enabled me, and encouraged me to think carefully and be as economical as I could in terms of making sure each scene and the action that takes place within it is communicated effectively to the audience. Early on in the production, it became apparent to Wing and I that one of the main challenges with the production of this animation would be making sure despite the complex story (given the time we were allocated) we would have to develop every aspect with the intention of making the story apparent to the audience in every way possible. This is where the simplicity of the movement, the shot that focuses entirely on the action intended to move the narrative forward and finally, the use of characters, props and staging to encompass the premise of the scene in just a few seconds.
OUAN504 - Animating, Grabbing the Poster
This was one of the most challenging scenes to create because it seemed like a difficult idea to execute at first. The idea was to have a similar shot to the one earlier in the sequence where the poster is blowing in the wind on the barn wall, but have a character come in shot and grab it to start executing their plan (which is located on the back). The first step was to animate the first second of the character coming into the shot and reaching out to grab the poster, so I spent some time doing this and lining up the characters hand with the edge of the poster just before they grab it to pull it off the wall. I tried to make it look as natural as I could, focusing on the movement of the arm and head as they were the main features of the character in the shot.
I thought carefully using what I had learnt in Maya to try and join up the poster to the hand of the character and have them move together. Most of my efforts were focused on the constrain option as that was (from my understanding) the option to control certain points of an object that has been modified with nCloth. The first thing I did was try to constraint the vertices of the poster to the vertices of the characters hand, and that didn't work. Secondly, I attempted to constrain it to the controller, which didn't work either. I spent some time looking only and tried some of the methods shown there, however I couldn't find any tutorials specific to what I wanted and found it difficult to make and progress. My understanding was that the vertices of the poster object had to be constrained to another object, so it was difficult to troubleshoot what was missing from my attempts. Eventually I decided to ask Mat for help and after attempting a couple of his own methods including a script called Rivet. Rivet is a script to 'constraint buttons and other objects to polygonal or NURBS surfaces fast and interactive'. So it seemed to fit the idea of what I was hoping to do. Unfortunately this didn't work either, so we had to rethink. We ended up doing it a more manual way, which was fine as long as it did the job! Mat took a polygon cube and embedded it within the hand of the character, and then parented it to the hand controller of the character, meaning there was now a polygon linked to the hand of the character. Some of the poster objects' vertices were highlighted using the brush tool and constrained to the hand controller - which worked quite well! After this some minor adjustments were made to the settings of the objects including the strength of the constraint which I increased to 70 from 20 and it seemed to be a high enough value to make the pull off the wall look natural and authentic. Something interesting about this was the way it was key framed, and it involved turning on and off the Enable option, this when on, activates the dynamic constraints and is on by default. Enable is on by default and is used to activate and deactivate the dynamic constraint as necessary, without the constrained cloth, (or in this case poster object) snapping back to the start position if it is animated, so it's really useful and perfect for this.
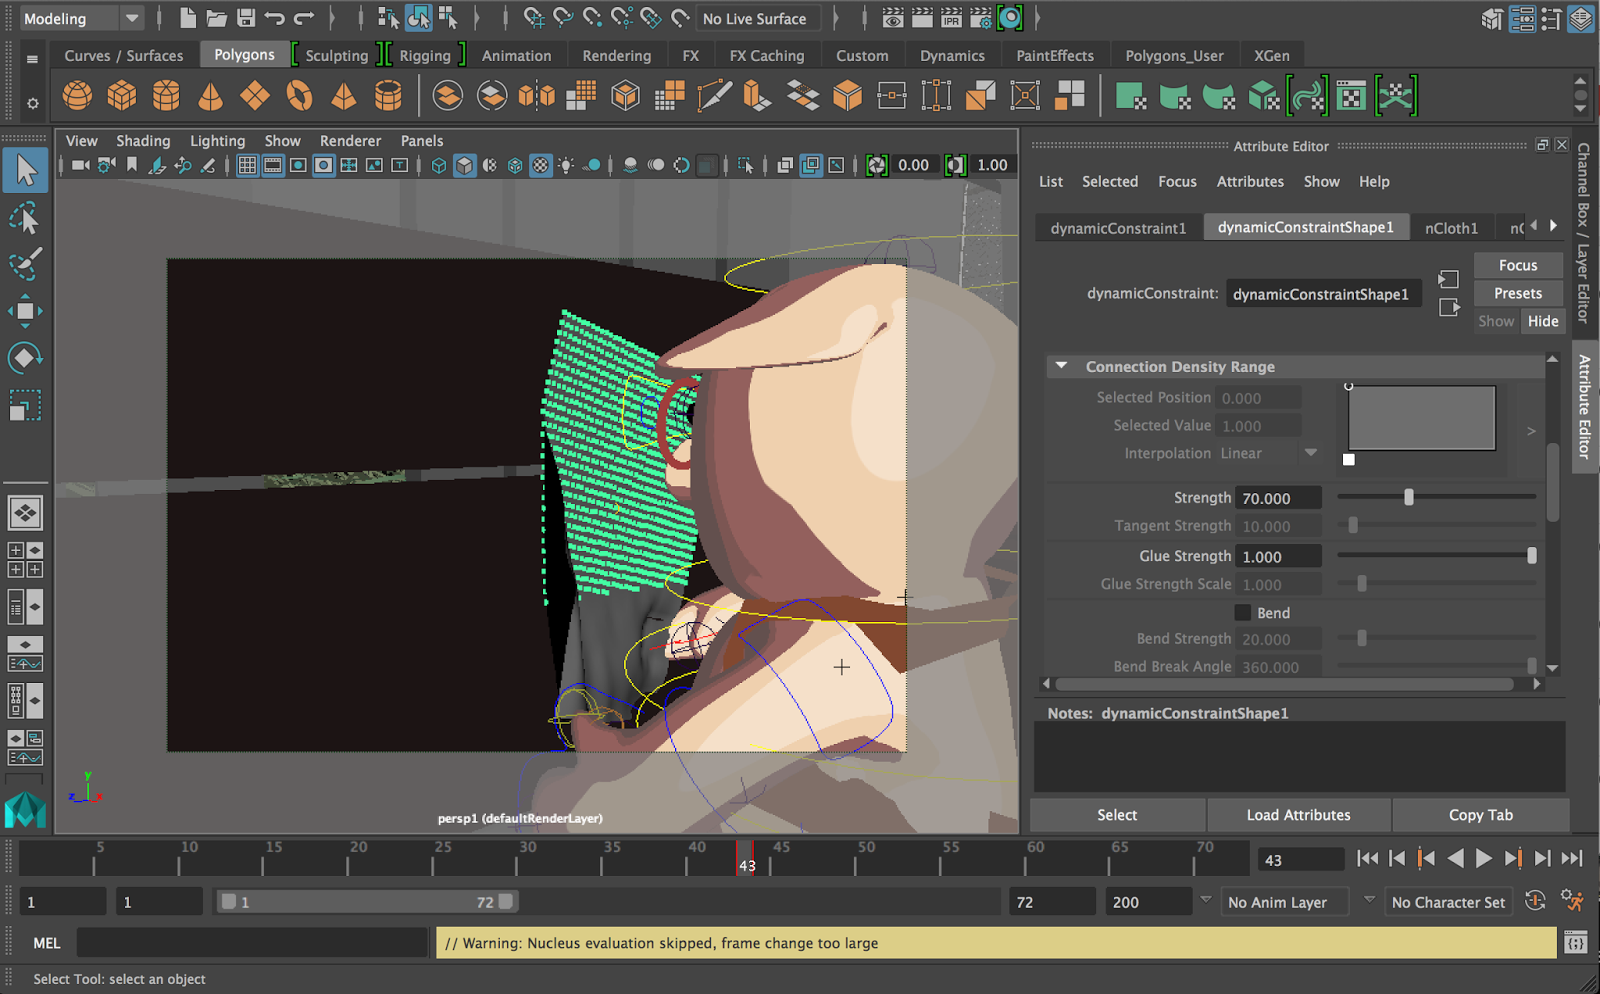
The final part of the scene simply involved the character doing a swift turn around as he exits the shot to show the fast pace and urgency in their movement. This worked quite well because of the short number of frames it was animated over, and all in all I consider this quite a successful scene and a nice addition to the final animation without taking up too much time in terms of on screen scenes.
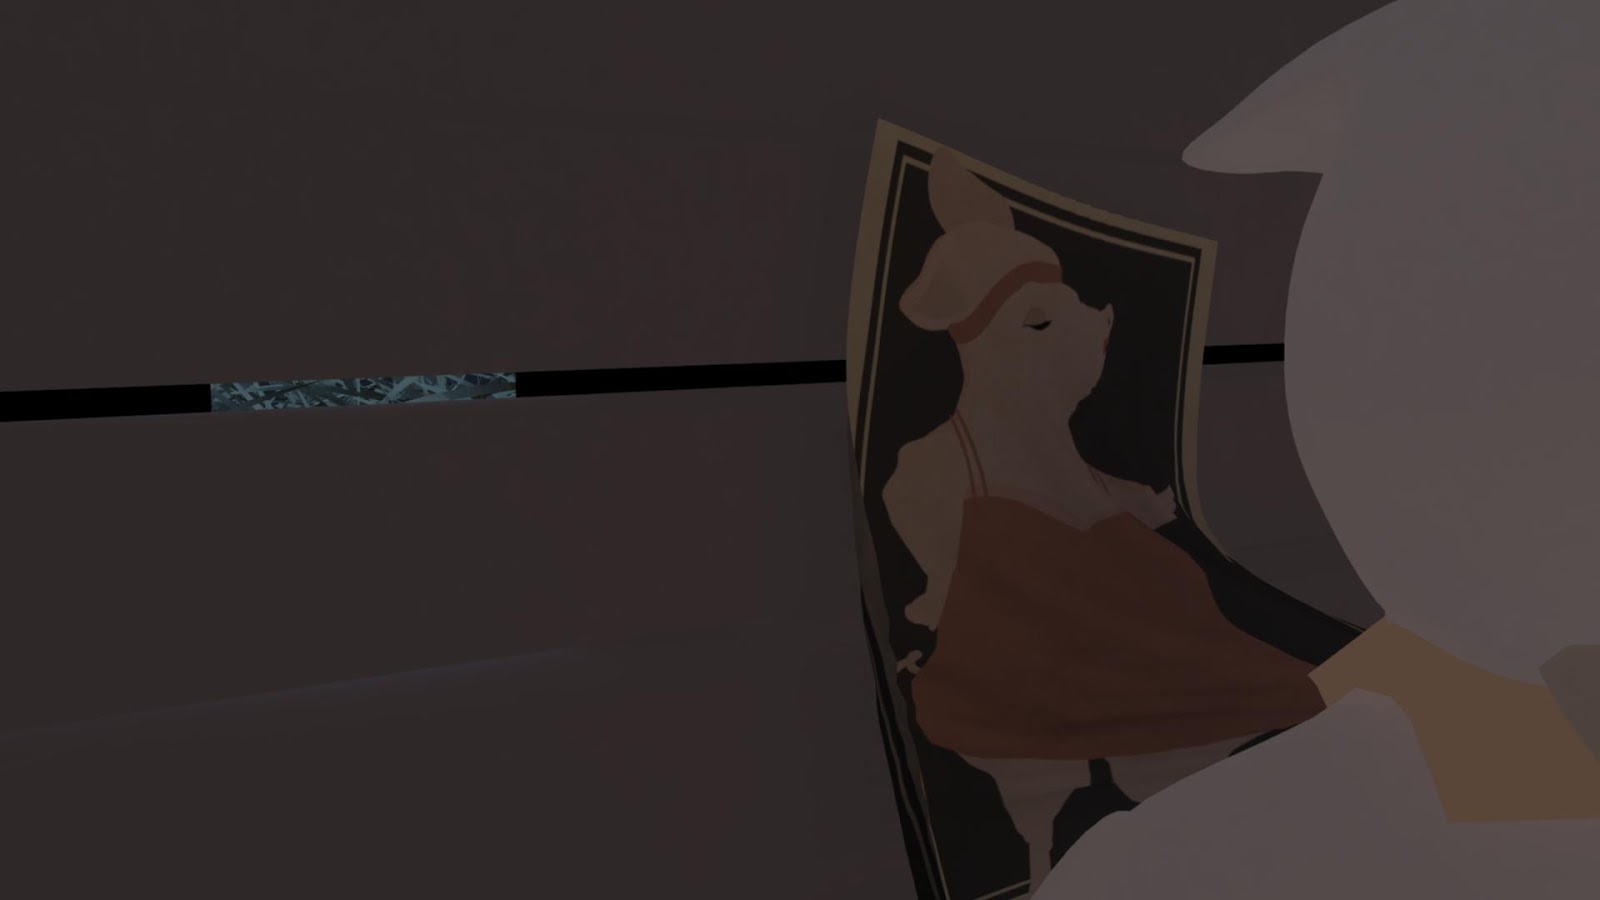
I thought carefully using what I had learnt in Maya to try and join up the poster to the hand of the character and have them move together. Most of my efforts were focused on the constrain option as that was (from my understanding) the option to control certain points of an object that has been modified with nCloth. The first thing I did was try to constraint the vertices of the poster to the vertices of the characters hand, and that didn't work. Secondly, I attempted to constrain it to the controller, which didn't work either. I spent some time looking only and tried some of the methods shown there, however I couldn't find any tutorials specific to what I wanted and found it difficult to make and progress. My understanding was that the vertices of the poster object had to be constrained to another object, so it was difficult to troubleshoot what was missing from my attempts. Eventually I decided to ask Mat for help and after attempting a couple of his own methods including a script called Rivet. Rivet is a script to 'constraint buttons and other objects to polygonal or NURBS surfaces fast and interactive'. So it seemed to fit the idea of what I was hoping to do. Unfortunately this didn't work either, so we had to rethink. We ended up doing it a more manual way, which was fine as long as it did the job! Mat took a polygon cube and embedded it within the hand of the character, and then parented it to the hand controller of the character, meaning there was now a polygon linked to the hand of the character. Some of the poster objects' vertices were highlighted using the brush tool and constrained to the hand controller - which worked quite well! After this some minor adjustments were made to the settings of the objects including the strength of the constraint which I increased to 70 from 20 and it seemed to be a high enough value to make the pull off the wall look natural and authentic. Something interesting about this was the way it was key framed, and it involved turning on and off the Enable option, this when on, activates the dynamic constraints and is on by default. Enable is on by default and is used to activate and deactivate the dynamic constraint as necessary, without the constrained cloth, (or in this case poster object) snapping back to the start position if it is animated, so it's really useful and perfect for this.
The final part of the scene simply involved the character doing a swift turn around as he exits the shot to show the fast pace and urgency in their movement. This worked quite well because of the short number of frames it was animated over, and all in all I consider this quite a successful scene and a nice addition to the final animation without taking up too much time in terms of on screen scenes.
Monday, 30 November 2015
OUAN504 - Rendering & Troubleshooting
I was about to render a modelled scene properly for the first time, I double checked all the render settings to make sure there was nothing unnecessary being rendered. Also making sure that the individual frames were exported in JPEG format and the quality was at HD 1080. The first scene I rendered was the time-lapse scene which consisted of a total of 120 frames. I started the render at around 3:30pm and I knew it would take longer than a few hours to render the scene so I spoke to Steve from IT resources and he said it would be okay for me to leave it rendering over night to avoid the batch render cancelling as they computers shut off automatically at just after 9pm normally. He was able to change the permissions on the particular computer I was rendering on to stay on, and the scene was able to render throughout the night. I came in at around 9:30am the following day and the scene had rendered around 17 frames during the 18 hours it had been rendering, so it was taking around an hour per frame. It was too slow to be viable so I spoke to Mat and he said it would be okay to render across several computers, since on this particular day nothing was timetabled and the room was virtually empty. I loaded my work across three separate computers, dividing the work into thirds and allocating 30 frames to each of the computers. After setting everything up I went back to the IT resources and spoke to Mike, who said it would be fine to change the permissions on these computers as well, like Steve had previously done for me. I got the unique computer number from the towers of each computer and he was able to do it remotely from his office. Unfortunately after spending some time monitoring each of the computers I found that one continued to crash so I had to cut it down to two and render off of those instead of all three.
The initial environment shots I found took the longest to render because they essentially comprised every element that had been modelled, including the heavier elements such as the grass and fence, both made of polygons and together make up around two thirds of the scenes total content in terms of polygons. Due to this, I tried to get these scenes out of the way first while I worked on other less detailed scenes, such as the action taking place inside the barn. This ended up being a fairly efficient process and no time was really lost when you consider that the rendering took place in the background and luckily due to the available resources, could be left to render whilst other progress could be made on the project in other areas.
One thing I did do before each scene was rendered was render still frames at various points throughout the sequence, at a low quality so it didn't take up to much time. The reason for this was so I could look at the lighting and camera angles throughout the sequence and make any small modifications before the final scene was batch rendered, as I wanted to prevent being unhappy with how the frames looked or for example, how the scene was lit after half of the scenes frames had been rendered, thus wasting valuable time. I tried to be as thorough as I could be when setting up scenes to render and testing aspects such as the lighting. For various scenes I even changed the 'physical sun and sky' from a directional light to an ambient one, and changed the intensity to make it so there was a faint glow of white-blue light coming through the gaps between the planks that make up the barn. I found this added a cinematic element and looked a lot better than before when the outside was almost completely black, making the scene feel a little lacking overall. Another lighting consideration that I changed scene to scene was the interior lighting of the barn. Depending on the angle of the camera and the time of day outside the barn, the interior could become very dark and poorly lit. I decided to change the 'decay' on the lights to linear rather than quadratic, meaning there was more light in the scene. However, to balance this further I did have to change the intensity from 20 to around 2 - a tenth of the original intensity in order to compensate for the change in the decay settings. With this project in particular and the nature of the way rendering and production is conducted I made a special consideration to make sure that there was continuity from scene to scene. What I mean by this is that since each scene is created individually in terms of animation and direction, and then rendered by itself, it was important to make sure that aspects such as the time of day outside made sense when the various scenes are finally stitched together into a final sequence.
I ran into several problems whilst trying to render various scenes throughout the project. Some of which were quite easy to solve and others not so much. One of the strangest problems I encountered when trying to batch render a scene was that the rendering didn't complete and essentially said that rendering was completed without rendering any of the individual frames. Wing also encountered this problem whilst attempting to batch render the 'bouncing ball' scene. I believe the issue was with mental ray, but I never actually discovered the cause of the issue. I read through a lot of forum posts and a lot of the contributors suggested different causes to the problem, a lot of them didn't apply to mine and Wing's situation though. This particular problem first happened to me when rendering the scene with the poster affected by the wind. At first I thought it could be a memory issue, but after playing around for a couple of hours it was working again. It's strange because the main feature of the scene I was adjusting was the lighting, specifically the physical sun and sky. This leads me to believe the issue was with mental ray, or perhaps the translation to mental ray. One good thing that came from having to troubleshoot these issues is that I learnt how to use the script editor to try and discover the source of problems that were occurring. This will help me a lot in the future I think when I come across various issues.
Overall, the process of rendering in this was an invaluable experience in terms of time management, planning and in a way organisation. I found that it was vital considering the length it takes to render different scenes that it is implemented in an efficient way so as to waste as little time as possible. It showed me how important it is to make sure a scene is ready and to an extent before rendering for real.
OUAN504 - Animating, Entering the Barn
This is the first scene in the animation where we see the pigs. I tried to tie scenes together in an interesting and unsuspecting way by cutting suddenly form the previous scene which is where we see the poster on the wall into a lot of movement from the pig running into the barn with the camera following from behind, almost like a steady cam shot. This scene in particular probably took the most time out of the scenes I was allocated to animated. I think this was mostly because of the camera angles I was trying out, and attempting to make work. In the end I settled for a shot that begins outside of the barn and follows the 'strong pig' character as he charges into the barn and vaults on of the sty fences to 'rendezvous' with the other characters. I tried to create movement across all of the characters for this scene, for example even though it isn't clearly visible I tried to make sure there was overlapping movement across all of the characters during the duration of the scene. This gave me a good grasp of the situational aspects of the scene across different characters. The smart pig and young pig taking notice and becoming aware of the other character's arrival. As well as that, this was the first scene in which real animation outside the manipulation of the camera was involved and I wanted to make it as high quality as I could so that the audience gets an immediate sense of how the characters move and interact with the environment based on their proportions and size. The characters we designed are supposed to be relatively small, and coupled with this, their proportions are quite interesting as their limbs are short. The movement had to compliment this factor and so I did some research including reviewing 'The Animators Survival' guide in order to get solid information about how to over come this.

The animation came fairly easily, after a few frames I got the grasp of the way keyframe animation works in Maya and it became quite simple to control. It made me think in a way I've never thought about animation because instead of drawing a character over and over I was moving individual components of parts of a character in order to make them move. So, when I was creating the running sequence I would move the left arm and think about the movement in the right arm, then the legs and the body and head individually. I think this process gave me a better grasp overall about the nature of animation and the ways to think about movement. The movement involved in this scene was a run sequence followed by the character vaulting over the sty fence. The most difficult part I found was the run cycle due to the unusual limb lengths the character had. I did my best to follow a traditional method of creating the run cycle with a similar pattern, modifying it slightly to accommodate for the character's proportions. After this the vault was fairly straight forward and I used some references in order to get the correct positions throughout the duration of the vault, which lasts a short amount of time. During this movement from the 'strong' character, there was also movement from the other characters as they notice his arrival. I tried to make it look natural as if they turned their heads and came to attention as they saw him, hopefully this came off well.


Aforementioned the camera movement was a difficult decision during this particular scene, but in the end the shot following the pig as they enter the barn is one I quite liked and the shot the pans upwards during the vault and the remaining action in the scene worked quite well. Previously, it was difficult to find good camera positioning that documented this scene well, and showed the action in an interesting for the audience.
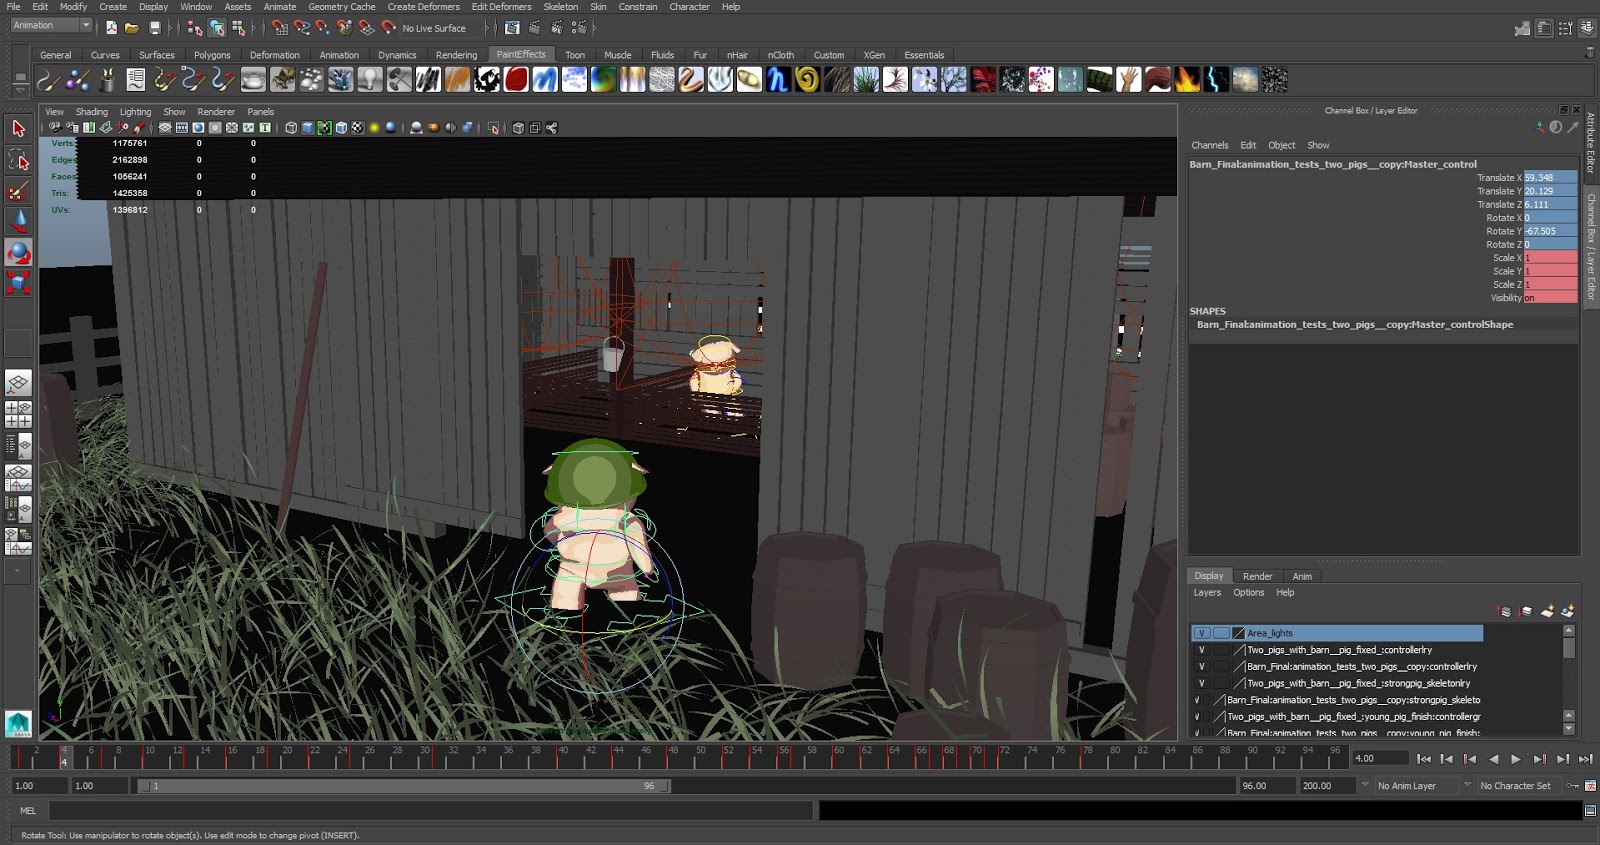
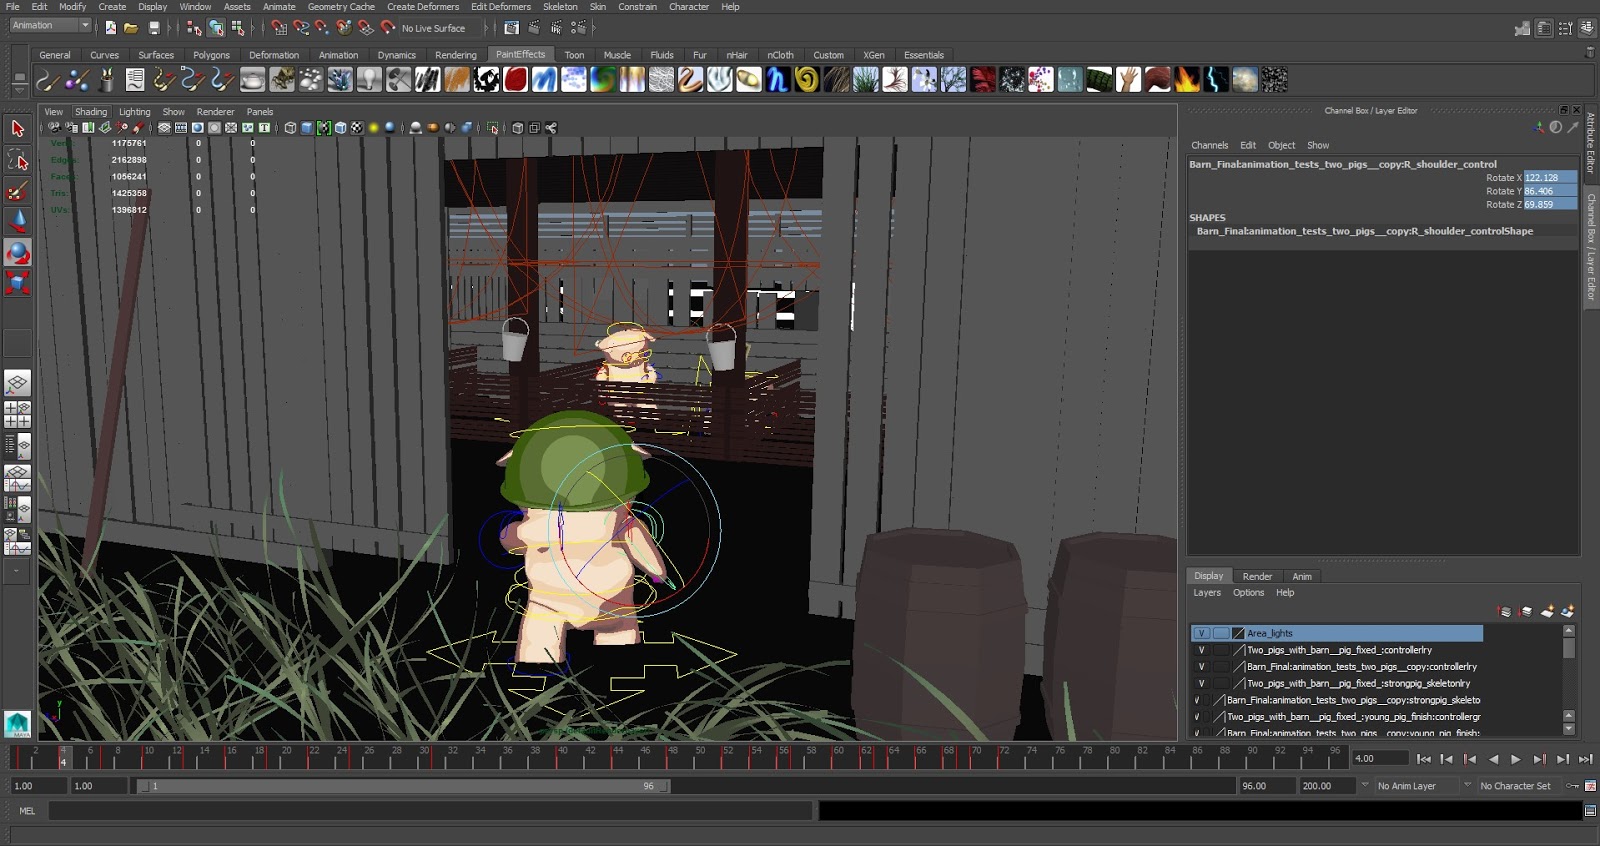
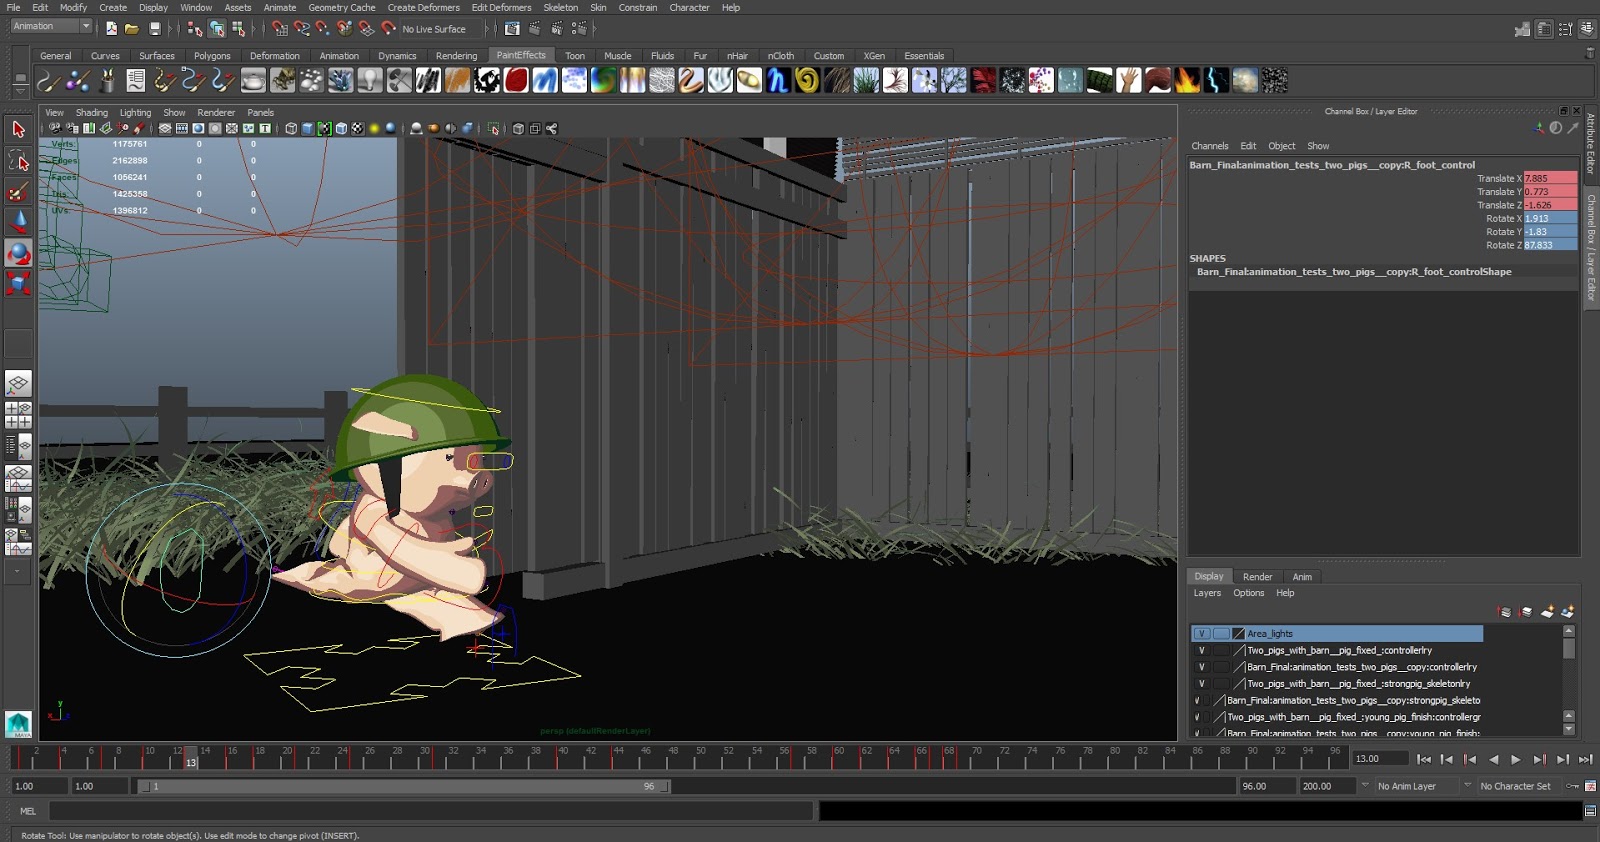
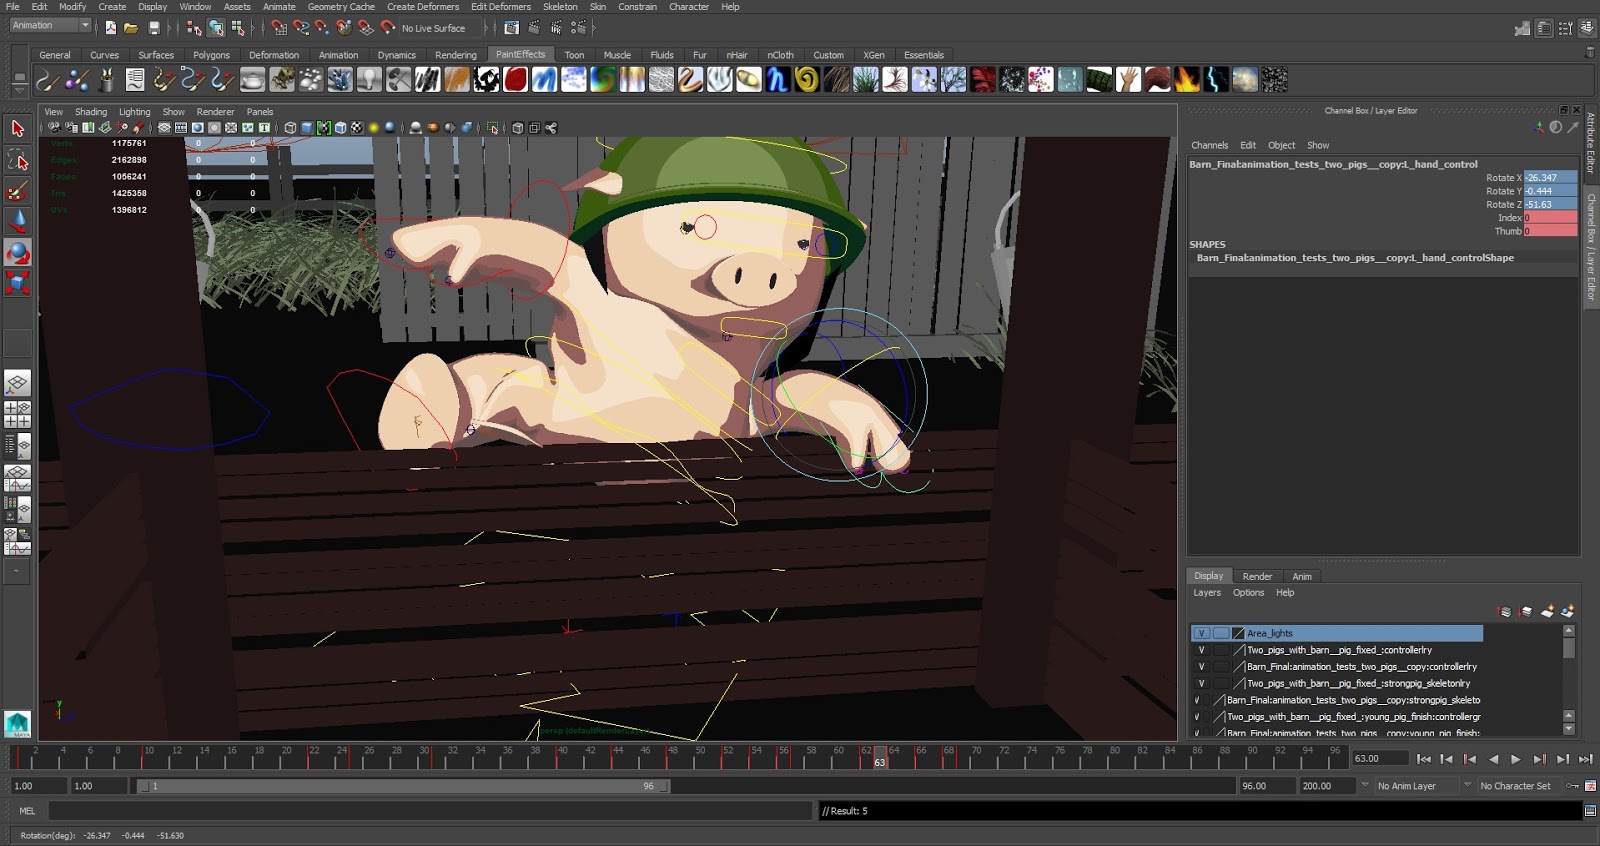
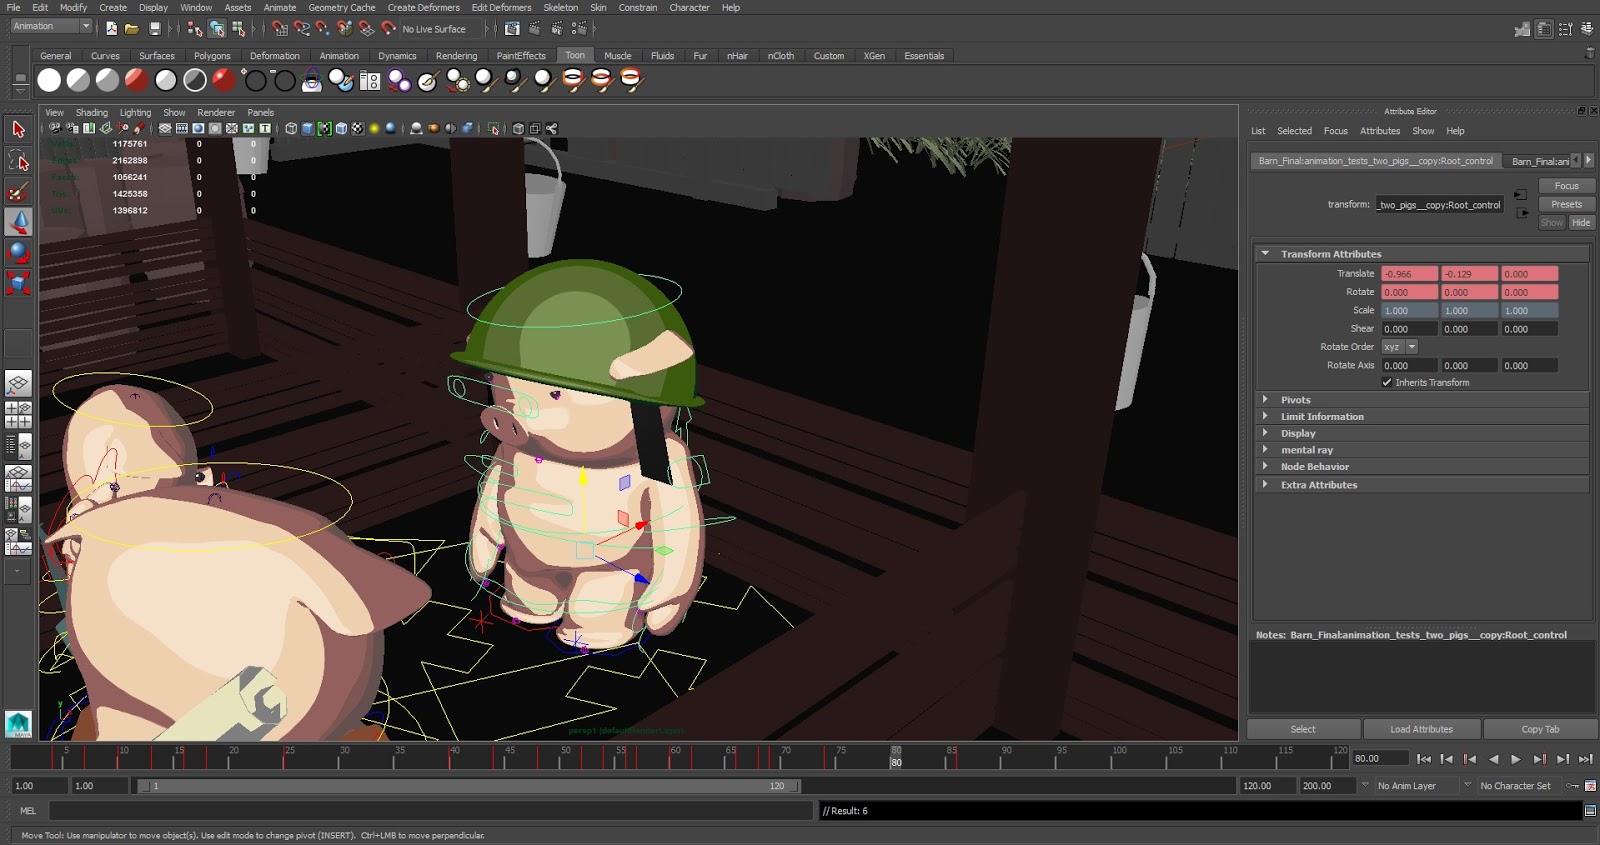
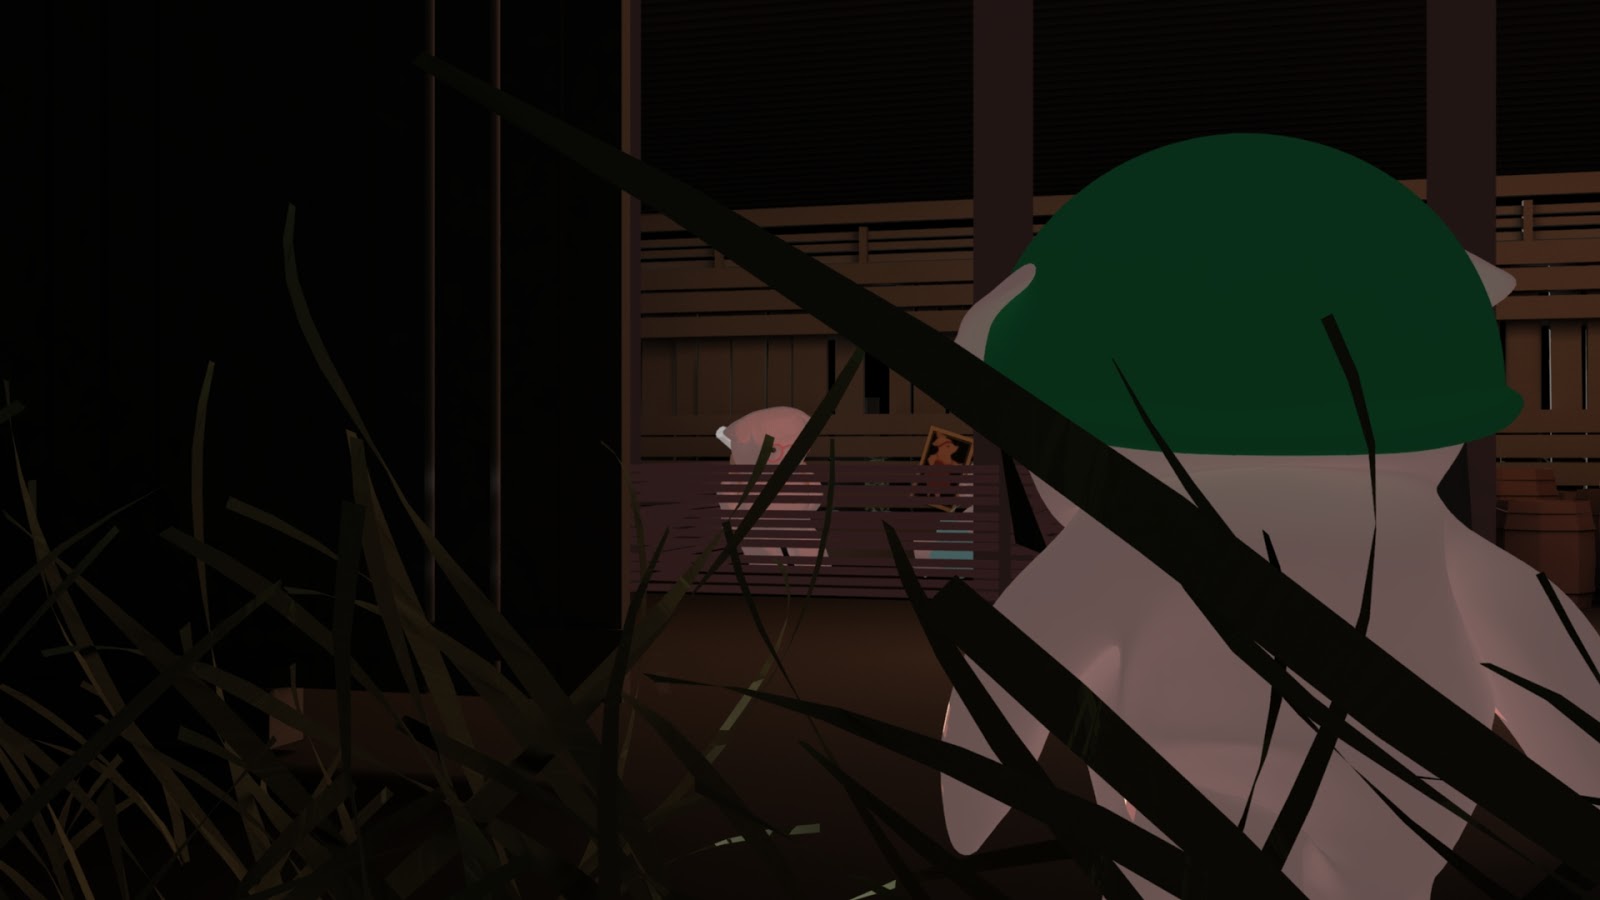
The animation came fairly easily, after a few frames I got the grasp of the way keyframe animation works in Maya and it became quite simple to control. It made me think in a way I've never thought about animation because instead of drawing a character over and over I was moving individual components of parts of a character in order to make them move. So, when I was creating the running sequence I would move the left arm and think about the movement in the right arm, then the legs and the body and head individually. I think this process gave me a better grasp overall about the nature of animation and the ways to think about movement. The movement involved in this scene was a run sequence followed by the character vaulting over the sty fence. The most difficult part I found was the run cycle due to the unusual limb lengths the character had. I did my best to follow a traditional method of creating the run cycle with a similar pattern, modifying it slightly to accommodate for the character's proportions. After this the vault was fairly straight forward and I used some references in order to get the correct positions throughout the duration of the vault, which lasts a short amount of time. During this movement from the 'strong' character, there was also movement from the other characters as they notice his arrival. I tried to make it look natural as if they turned their heads and came to attention as they saw him, hopefully this came off well.
Aforementioned the camera movement was a difficult decision during this particular scene, but in the end the shot following the pig as they enter the barn is one I quite liked and the shot the pans upwards during the vault and the remaining action in the scene worked quite well. Previously, it was difficult to find good camera positioning that documented this scene well, and showed the action in an interesting for the audience.
Subscribe to:
Comments (Atom)