


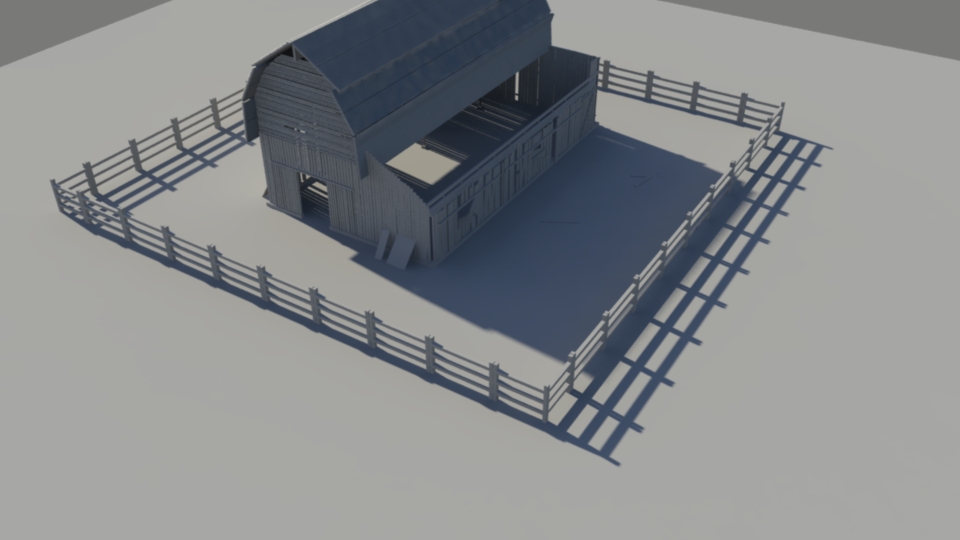
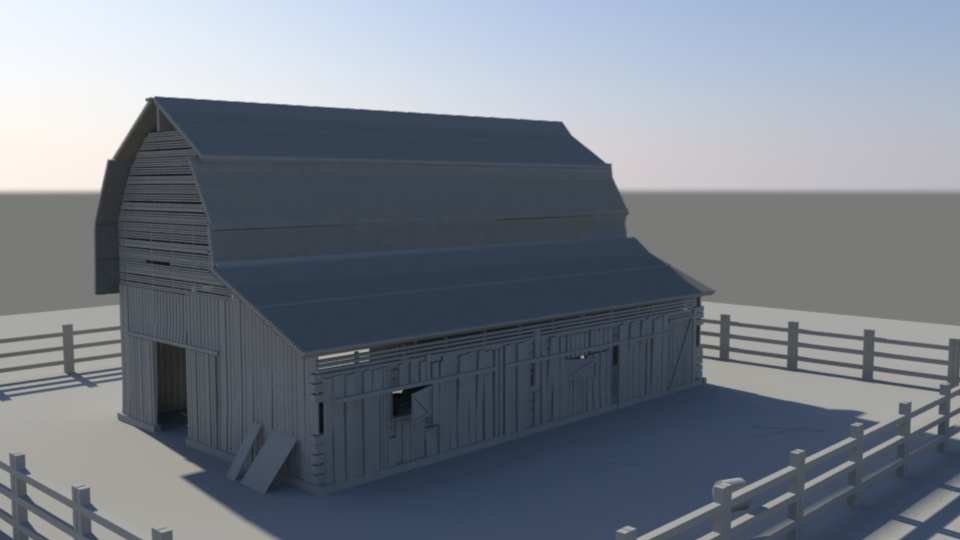
I tried to document my process as much as possible by rendering my progress as well as taking screen shots. This allowed me to not just view in shapes and geometry but also get a feel for how the barn looked using a rendered image, and specifically with the use of the physical sun and sky it meant I could view how the model interacted with lighting and shadows, which did in fact help me create the model and alter my approach slightly. For example, I really liked the way the sun would hit the model and pass through the small gaps in the planks of wood that made up the barn. This was more prominent when the sun was lower but it created a nice image and could be used to help encourage the portrayal of drama and scale when used in the final animation.
The whole process of creating the environment took a lot longer than I had expected and planned that it would, and I put this mostly down to not only using a piece of software and being slower due to inexperience but also the amount there was to learn and in a sense experiment with. During the project whilst I was building it and through talking to Mat and watching tutorials online and reading guides consisting of processes that explained how to produce certain results it felt like I was learning more and more each day, and more doors of possibility were opening. I also found myself thinking about what else could be possible, and what else I could achieve, which in turn, extended the process more and more. I was creating new shapes, I soon learnt how to use paint effects to create grass, trees, clouds, hay and a number of other textures and elements. Then once these had been converted to polygons the number of possible modifications grew even bigger - being able to change the colour to suit the colour scheme of the scene and even how these objects interacted with the lighting in the scene, for example of much of the light was defused. Lighting was another huge question mark I wanted to explore, I was quite familiar with the physical sun and sky and really liked the results it gave, but I found it incredibly interesting to experiment with that. I explored changing the angle of the 'sun' to emulate certain times of day, for example. As week as this playing with the intensity and glow of the sun also gave me some interesting options when it came to lighting. On one of the online guides I was watching the host demonstrated the way changing the amount of red and blue light that was produced in the physical sun could also be altered to give extreme results, or, some subtle and visually pleasing lighting results such as pink skies, or even emulating the look of an evening and night time sky. Making the sky look similar to that of a night or evening sky is something I also wanted to utilise and try to figure out due to the emphasis on day and night in the time-lapse format that is going to be used several times throughout the animation.


One of the key elements to the story is the large wire fence that acts as the main obstacle for the characters to escape from the barn and the farm. This was tough to model because it's not a simple shape from before and aside form the simplistic frame work it's made up of hundreds of small interlinking pieces of wire. I had a look at some wire fences online as reference and specifically at the shape of the wire and how it links together. I created a polygon pipe, and manipulated that into an L-shape, similar to a candy cane. I then duplicated this and combined the two to make an elongated U shape. Combining four of these in the arrangement shown below created an individual link in for the wiring in the fence. After that it was simply a case of arranging it and duplicated it thens of times until there was a complete row and eventually, a full fence comprised of these individual wired shapes. However, despite this the most difficult part of the fence making was putting together the frame of the fence, and trying to get the smaller details such as the screws in the joins between poles. Which was a good learning experience trying to create another accurate object using components in a realistic manner, and even if it's not apparent in the final animation that these aspects are present, I believe it was worth the effort and worth the learning experience.


The final element of the interior of the barn that I decided would be necessary to the story and as well as this not detrimental to how viable the scene was given the processing and time contrasts would be troughs for the area where the pigs will be. In my mind it's another subtle and small detail, but nonetheless adds to the overall feel and authenticity of the animation and specifically the environment. This object was created simply by extruding the faces of a cube polygon to look like a simplified version of a pig trough.

No comments:
Post a Comment